A remote access VPN (virtual private network) allows clients who are working remotely to firmly access and utilize applications and servers that deploys in the office Data Centre and head office, encrypting all VPN traffic the users send and receive during the communication over Secure network.
Remote Access VPN Setup
Below is the setup which we will be using to configure the SSL VPN in Checkpoint firewall
Local PC – 192.168.1.17 (from where user will access the applications of office server AND user is sitting in any remote location like HOME, Cafe)
Checkpoint Firewall – 192.168.1.18 (Will provide secure communication between user and LAN server over internet)
LAN SERVER – 10.1.1.10 (WHERE APPLICATION IS HOSTED AND SERVER IS LOCATED IN OFFICE NETWORK)
VPN Setup and Configuration: Checkpoint Firewall
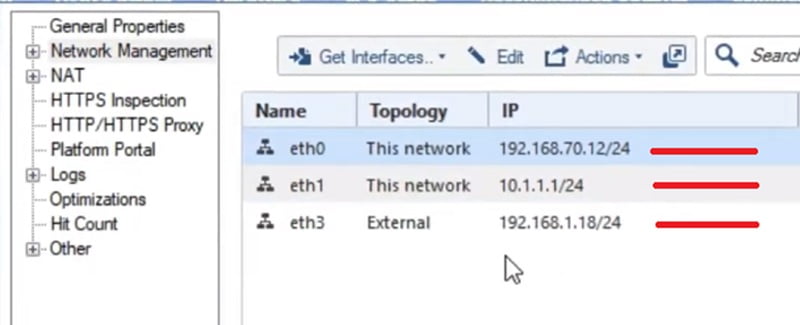
Here the interface configuration in the Checkpoint Firewall. Go to Smart Console -> Network Management -> Interfaces
Eth0 -> 192.168.70.12/24
Eth1 ->10.1.1.1/24
Eth3 ->192.168.1.18/24
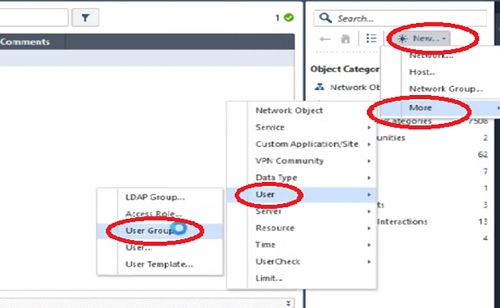
Create User
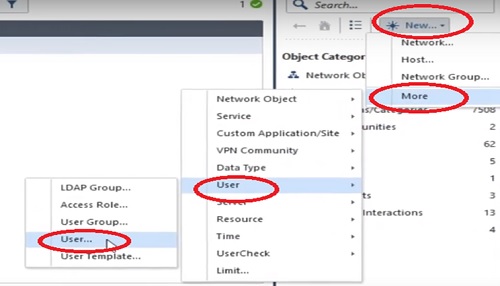
First step to create a user in the checkpoint firewall.
1.Go to Right Most corner in Smart Console “*” and select More
2.Select “User” in the next Tab
3.Choose “User..” in next available options
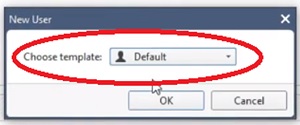
4.Select “Default” Mode from the next option
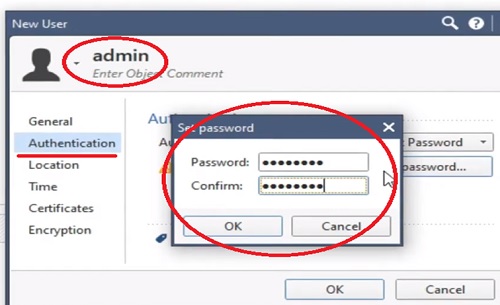
5.User name -> Admin
6.Give password for Local Authentication -> ipwithease&1131
7.Similarly create another user with name Admin2 and repeat steps 5 and 6 to execute the same.
8.Next step to create User Group
9.Name User Group Admin-Users and add above created users into it.
10.Add Admin and Admin1 users to the Admin-Users group.
Create VPN Communities
After creating user Group we need to create VPN communities from Security Policies TAB
1.Go to the Security Policies -> VPN Communities -> Select RemoteAccess VPN communities
2.RemoteAccess -> Select Participating Gateways -> Select already created Gateways from the option SGCM (already Created VPN Gateway)
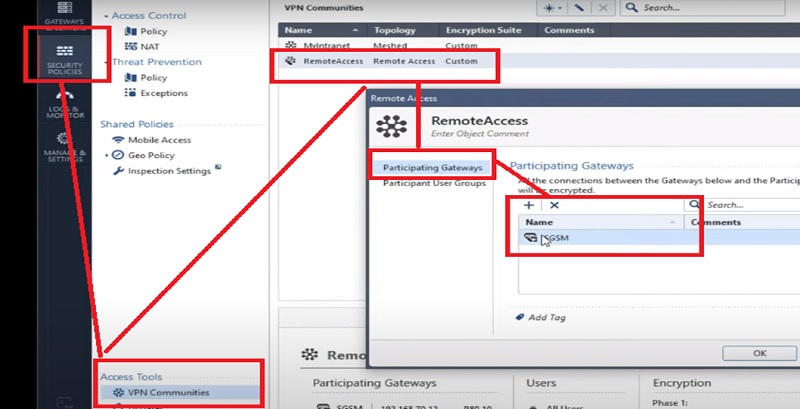
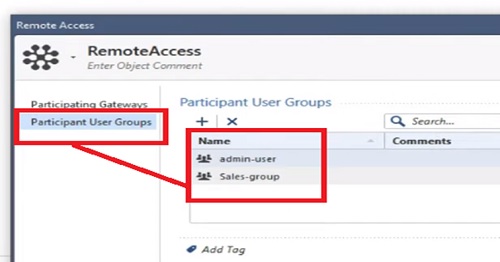
3.Now add Participating Users -> Go to the Participating Users Tab
4.Add already created User Group and call it here
5.We are adding Admin-Users and Sales-User group
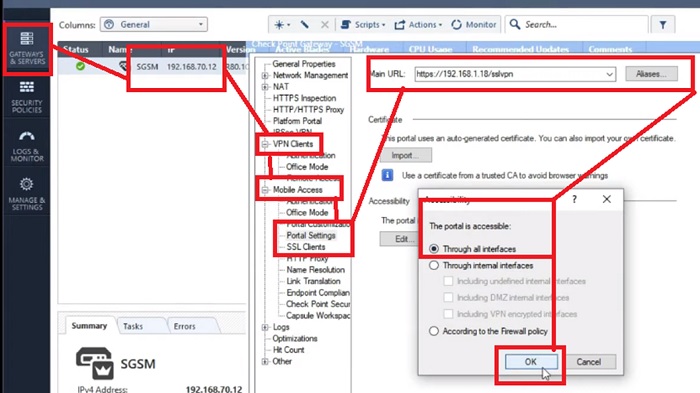
IP SSL configuration
Now we will move to the IP SSL configuration in the Checkpoint firewall.
1.G to the Gateways & Services -> Edit SGCM Gateway
2.Select VPN Clients -> Office Mode
3.Select Office Mode -> Allow User Group here. You can select specific user group -> Admin-Users OR Sales-User
4.OR you can select Allow Client Mode to All Users.

5.Further create Portal Setting which is used to connect with Firewall interface when trying to fetch the SSL VPN settings.
6.Select Portal Settings -> in VPN Clients and Check SSL VPN URL to download the application in User’s system
7.Here, URL is https://192.168.1.18/sslvpn—> https://<firewall external interface IP Address>/sslvpn
8.All connections through the entire interface.
Create VPN Security Policies
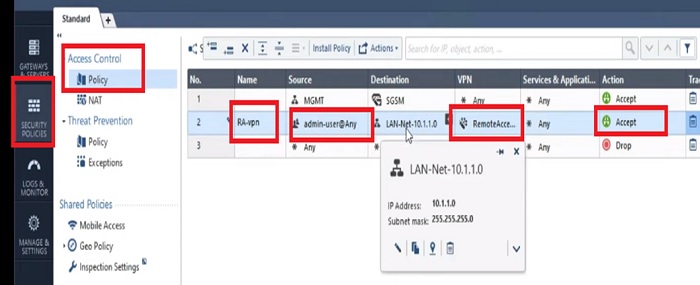
Here we will create a Security Policy to allow communication over VPN networks. Moreover you can modify the Security rule as per your requirement. Let’s suppose if Destination server is accessible over a specific port the same port needs to be allowed in the firewall policy.
1.Go to Security Policies tab -> Policy
2.Create New
3.Policy Name -> RA-VPN
4.Source Address -> Admin-Users (user profile)
5.Destination -> here you will allow the segment which users can access over SSL VPN.
6.MY server is placed in LAN Segment hence I am going to allow LAN subnet 10.1.1.0/24 as Destination Address
7.Allow Application Any or specific ports on which servers are running in the network
8.And put Action -> Allow
9.Install firewall policy and publish it.
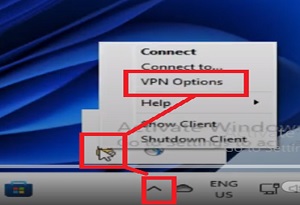
VPN Client Installation on User’s PC
Now login to User’s PC -> 192.168.1.17 and install Checkpoint VPN Client in User’s PC.
1.Go to up arrow in right bottom corner of the user’s PC “^”
2.Select VPN Client from the options. (VPN Client software needs to be download from https://192.168.1.18/sslvpn url from user’s browser)
3.Select VPN Options and open it.
4.Add New Option -> New VPN profile
5.Select Site Wizard
6.Add Server Details with IP Address of Firewall Gateway which is 192.168.1.18
7.Add Display Name -> PC-Gateway -> which is optional here.
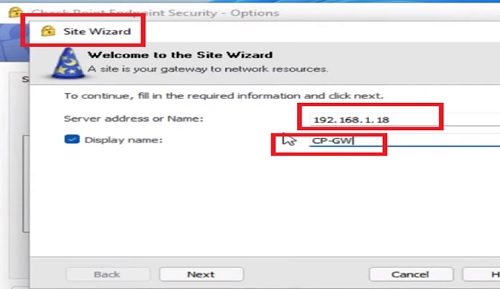
8.Click “Next”
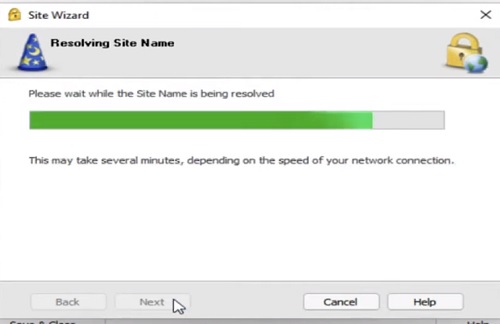
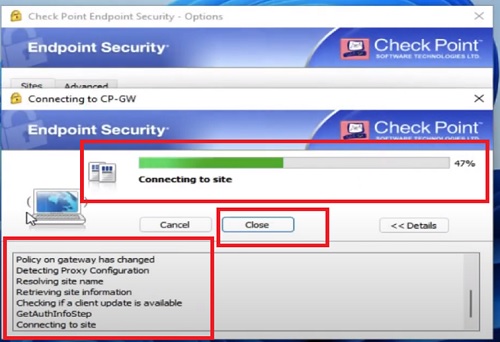
9.Now Checkpoint Endpoint Client will try to resolve the IP address of CP-GW
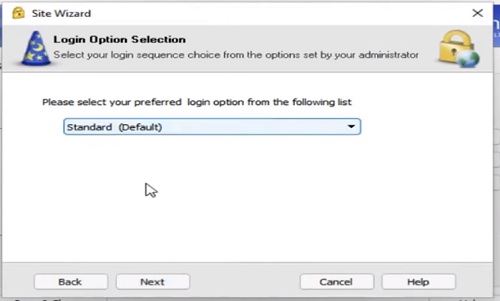
10.Select Login Option is “ Standard”
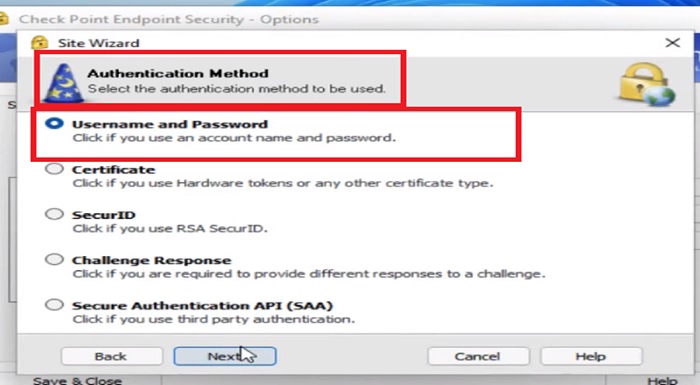
11.Click on Next and Select Authentication Method “ Username and Password”
12.Click Next for further action
13.Installation Finished for VPN 192.168.1.18
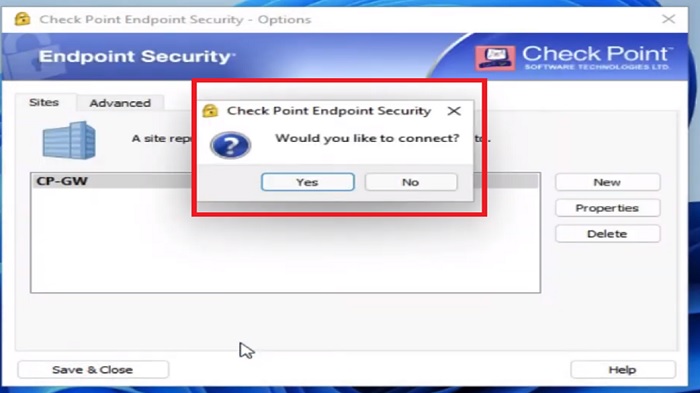
14.Now Press “Yes” to connect with Endpoint Security client
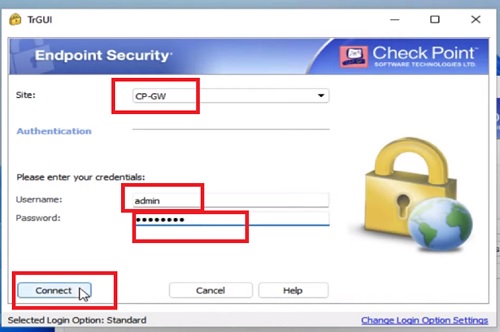
15.A prompt will be appeared on the screen to provide username and password which was created before in firewall (see steps 7 in “ user creation” tab above)
Now try to ping LAN –Server from User’s PC after connecting to SSL VPN. It should be responding over ping from the user’s cmd.
>ping 10.1.1.10
Moreover check ipconfig /all from the user’s system and you can see the VPN segment IP address which is assigned to the Ethernet Adapter of the system. Here we can see IP address 172.16.10.1 is assigned to user VPN machine.

You can also perform other actions to validate the server access over Client VPN from user’s machine like
- Ping
- telnet
- Web access
- Tracert
Thanks for reading!!!
No comments:
Post a Comment