Prerequisites to Configure Checkpoint Firewall
Sometimes in the network we need to install a new Checkpoint Firewall from scratch which requires a few prerequisite as follows:
- Console Cable
- Physical access to device (arrange any local site Engineer)
- Bootable USB Stick
Steps to Configure Checkpoint Firewall
Let’s understand how can we configure checkpoint firewall by a guided step by step process:
Step 1 Check if the version of the new device is up to date. If yes, then move to Step8 otherwise follow Step 1
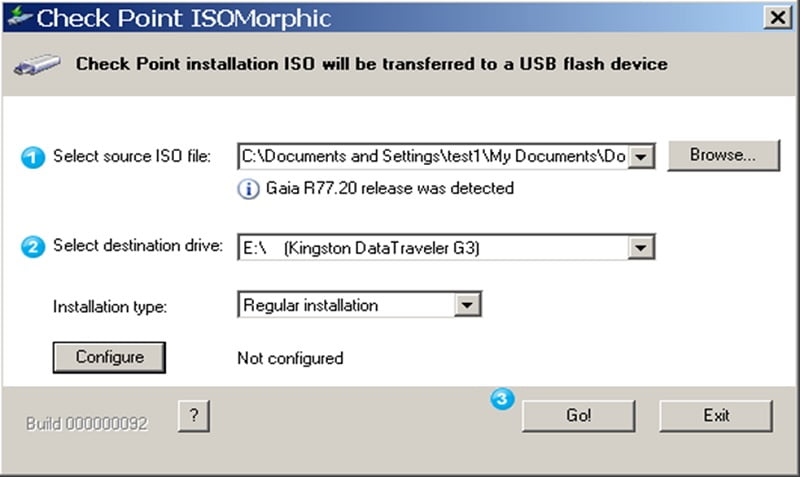
Step 2 Preparing USB Stick: Check Point sk92423 shows which USB stick is supported for installing checkpoint
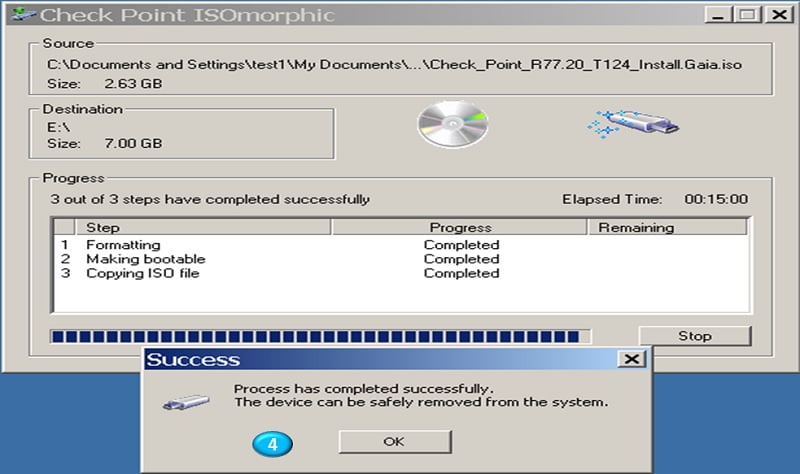
Step 3 Use Isomorphic to make a Checkpoint Bootable USB Stick
Step 4 Plugin USB stick in the device USB port and powered on the Checkpoint Device
Step 5 Enter BIOS Configuration
Step 6 Press TAB or DEL to enter BIOS to set up the booking devices.
USB-HDD and USB-CDROM have been picked for boot devices.
Step 7 Change here to USB boot.
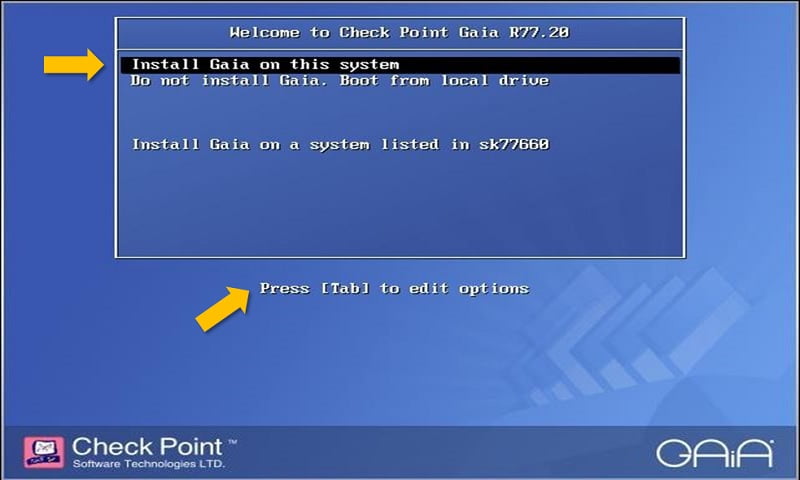
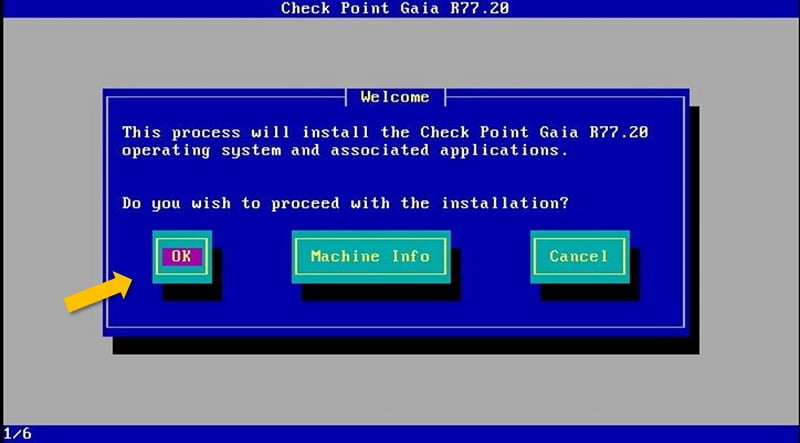
Step 8 Loaded the CHECKPOINT ISO and select on” Install Gaia on this System”.
Step 9 Select OK
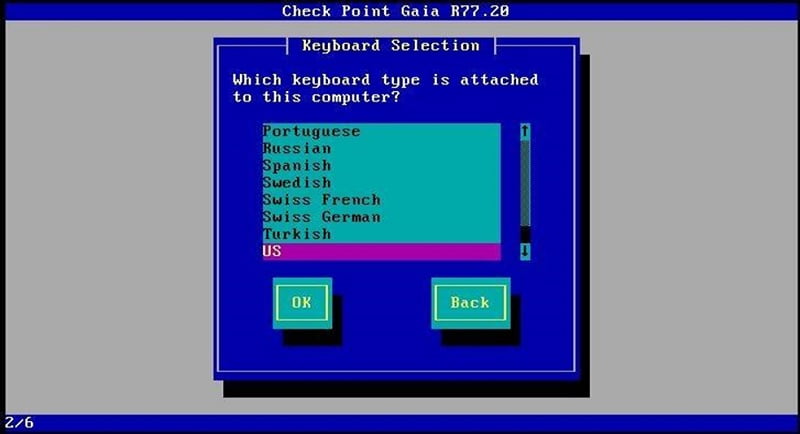
Step 10 Select language:
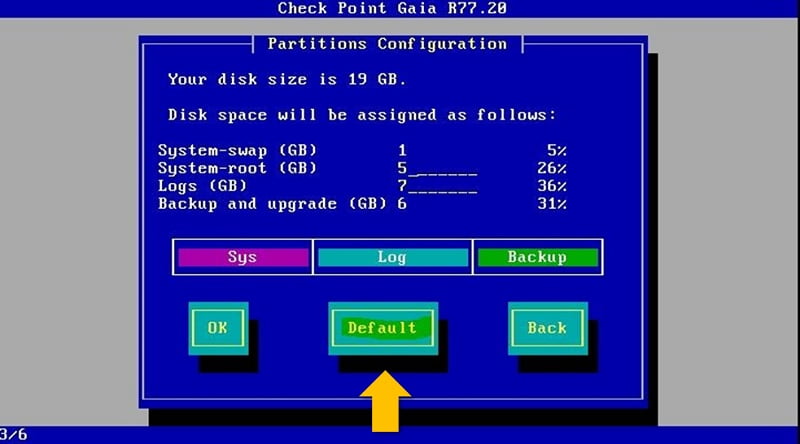
Step 11 In this figure we are seeing the partitions configuration, the nicely is the checkpoint system knows to calculate the disk space as his best practices,
Disk space along with percentage Is shown in the below images.
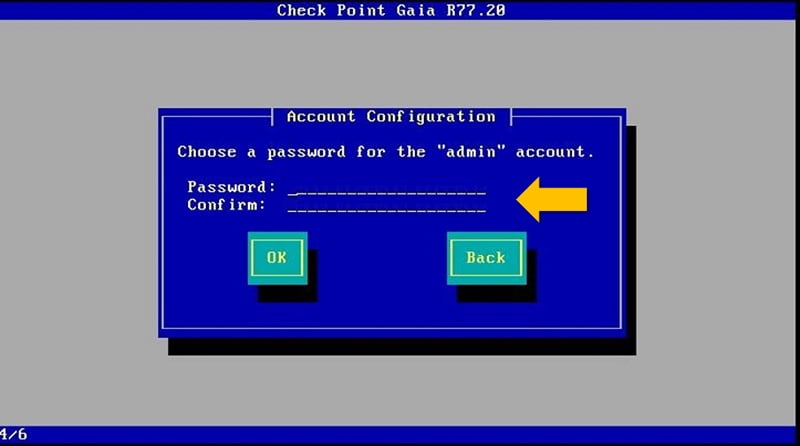
Step 12 We can set password for CSCONFIG, it is not Dashboard password.
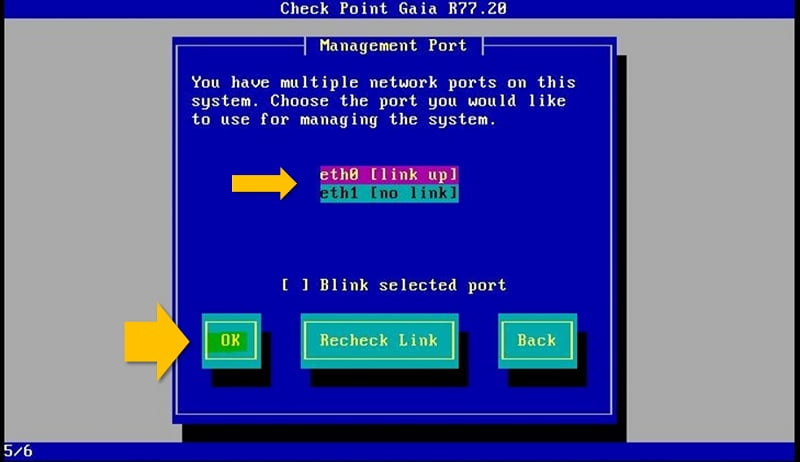
Step 13 Select your network ports and continue with OK
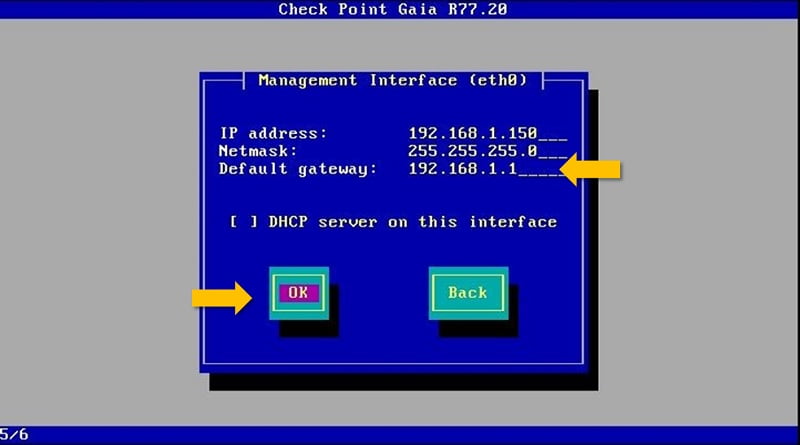
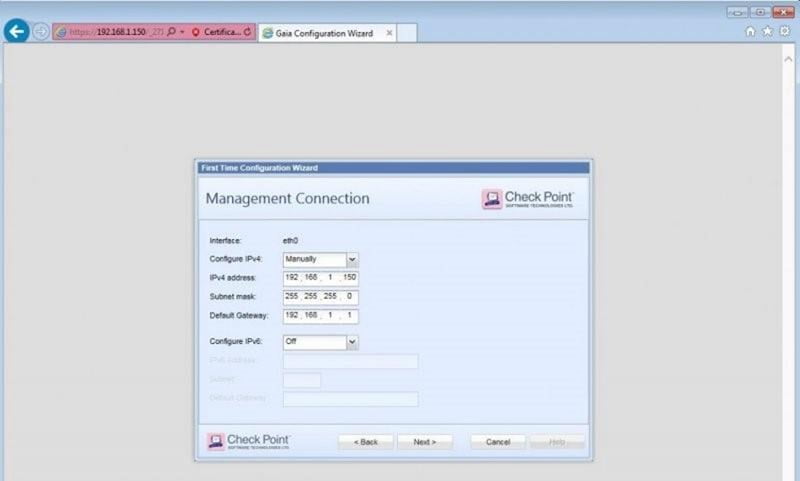
Step 14 Here we can set IP address of the Checkpoint device. Configure IP for management interface :192.168.1.150
Put Netmask -> 255.255.255.0
Default Gateway -> 192.168.1.1
And enter OK
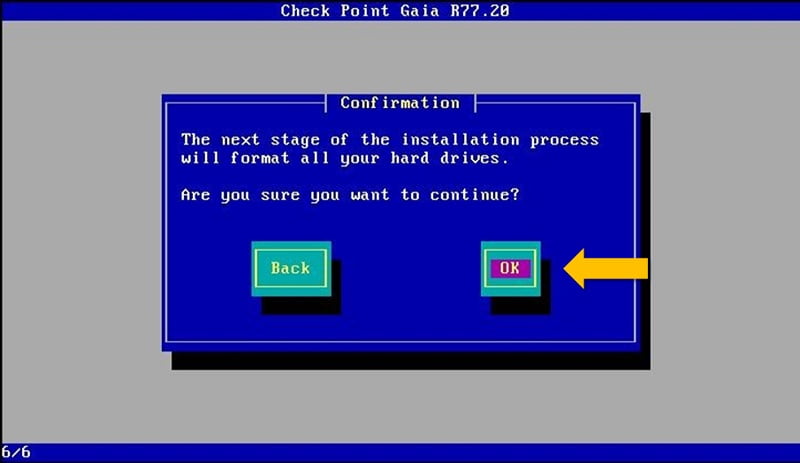
Step 15 It will execute hard drive format process and install the OS.
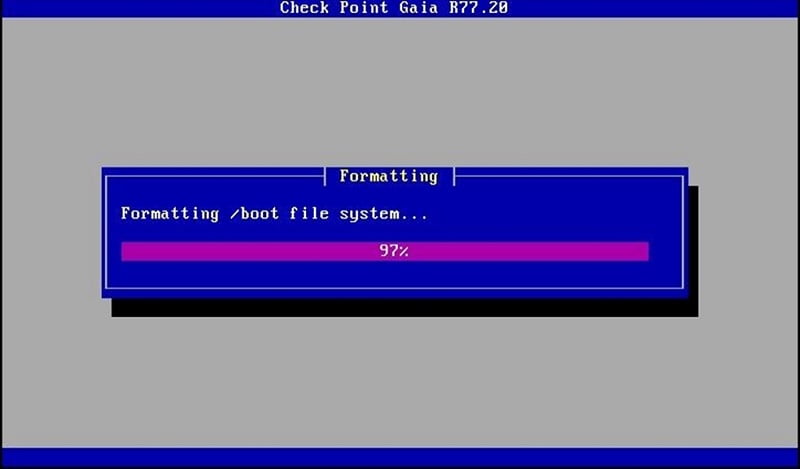
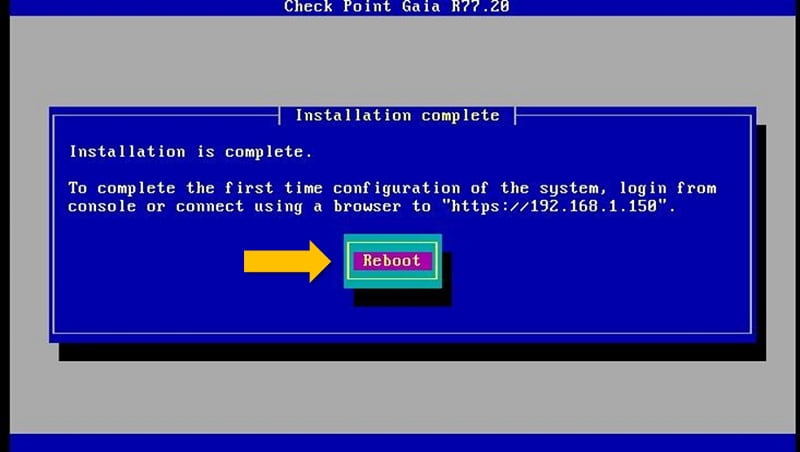
Step 16 Formatting has been started
Step 17 Perform reboot once Formatting has been completed. And connect to the management by “https://192.168.1.150” (which we have given in Step 14)
Step 18 Check Device access by using CLI/putty access of device
You can access the device from local system by connecting LAN cable to device eth1/management port and give below IP address to your local system
IP address 192.168.1.30
Subnet 255.255.255.0
Gateway 192.168.1.1
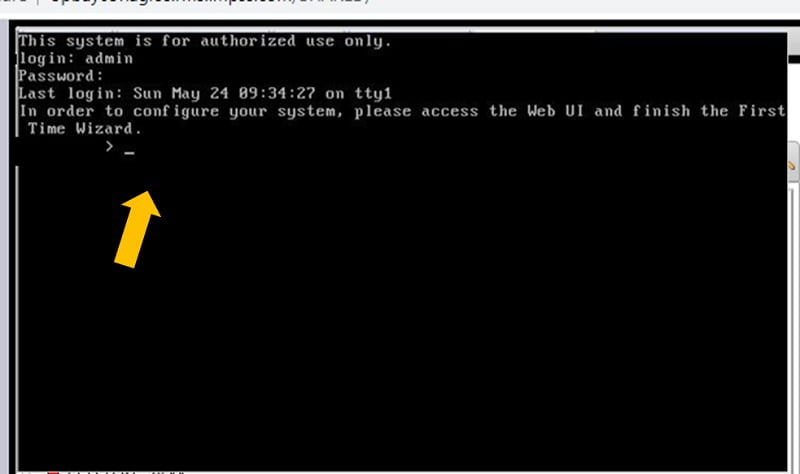
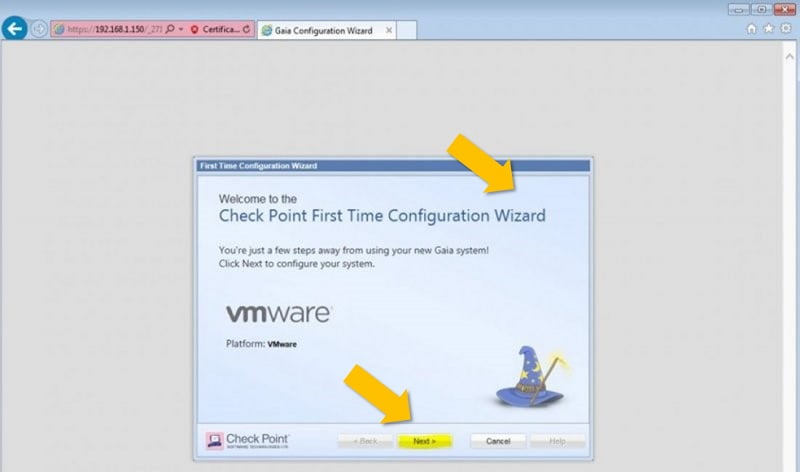
Step 19 OR Connect to the Gaia portal with username and password you set in previous step.

Step 20 And we’ll get the Gaia configuration Wizard.
At this stage, we have completed the OS upgrade from the firewall. Now we will configure firewall initial setup step by step.
Step 21 Continue with Gaia R77.20 Configuration: First time Wizard configuration will be prompt on screen.
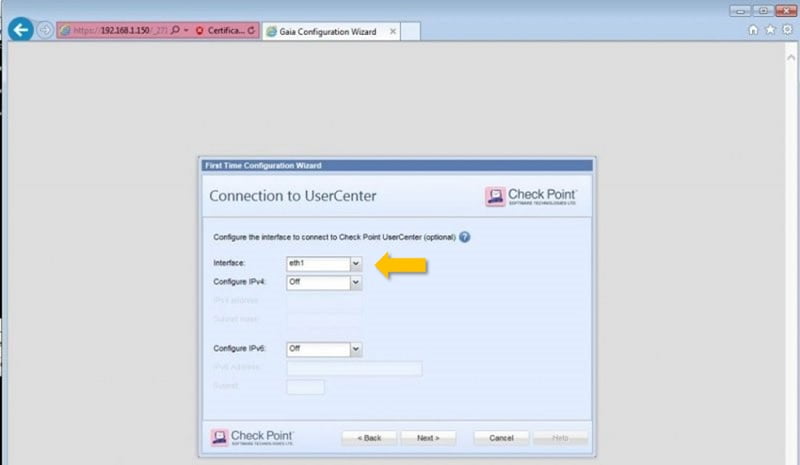
Step 22 Select Deployment option
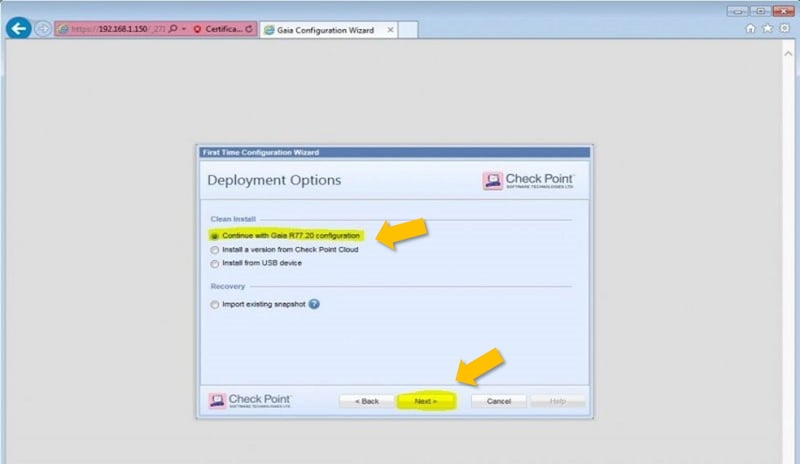
Note :: Please note that in this figure we have to specify the IP address we will connect to Smart Console
User interface required a licence.
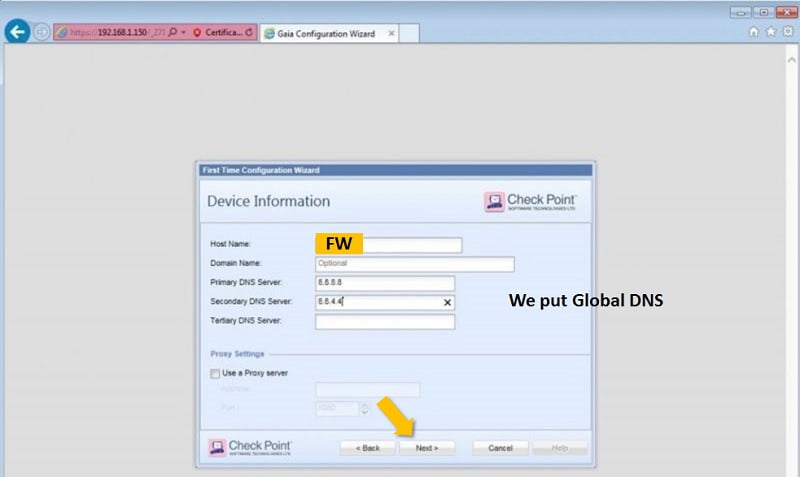
Step 23 Select DNS value and configured it according to the network topology.
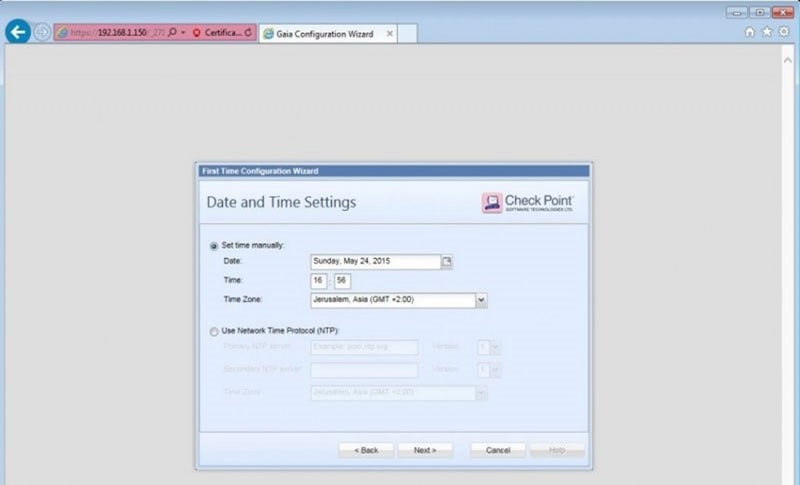
Step 24 Set Time or Date manually or Configure NTP server details.
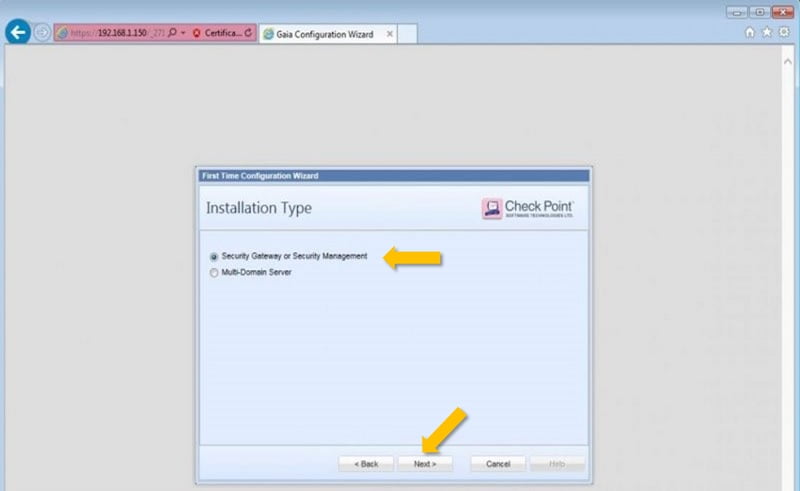
Step 25 And in Installation type select “Security gateway or security management”.
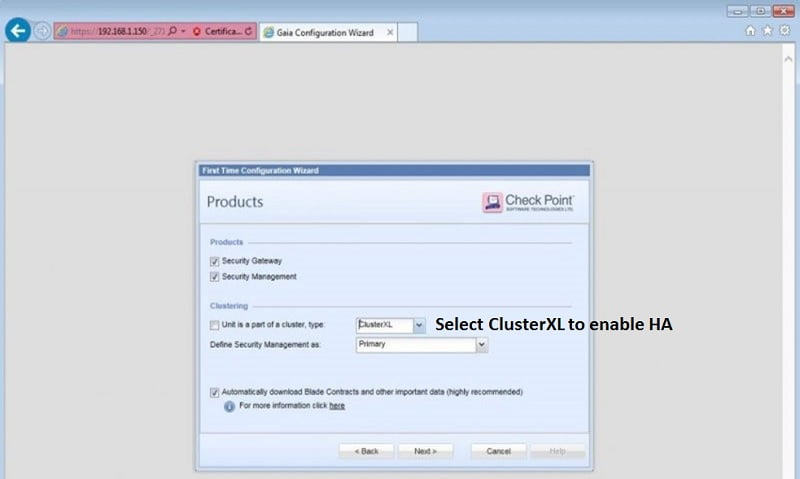
Step 26 Put the device in Cluster XL or skip this part if Checkpoint firewall configured as a standalone box.
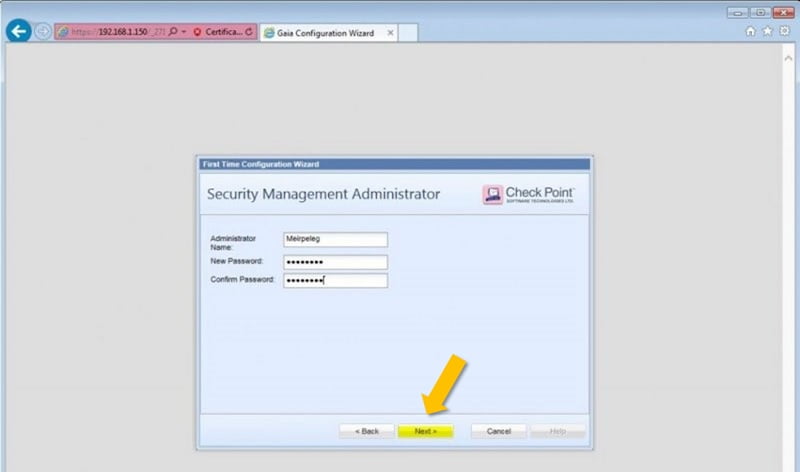
Step 27 Set User Password and for Security Management Administrator in Checkpoint Firewall.
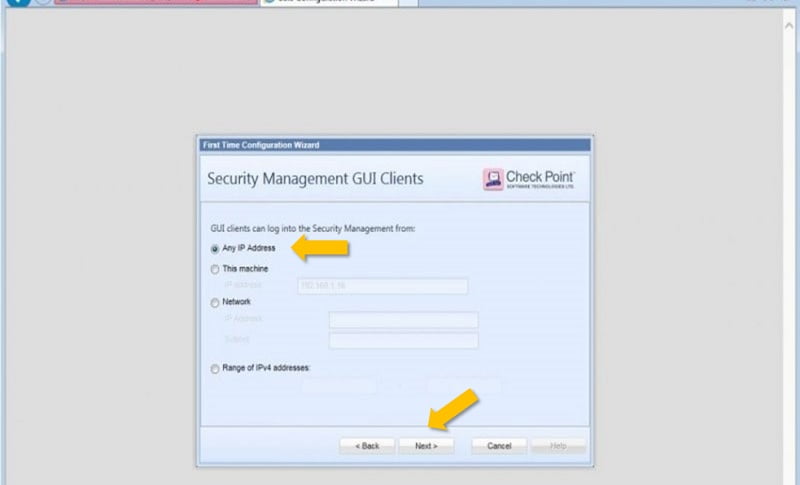
Step 28 Here we can set that only from a specific Computer or IP we will be able to connect to the Management console.
We are selecting Any IP address Option here.
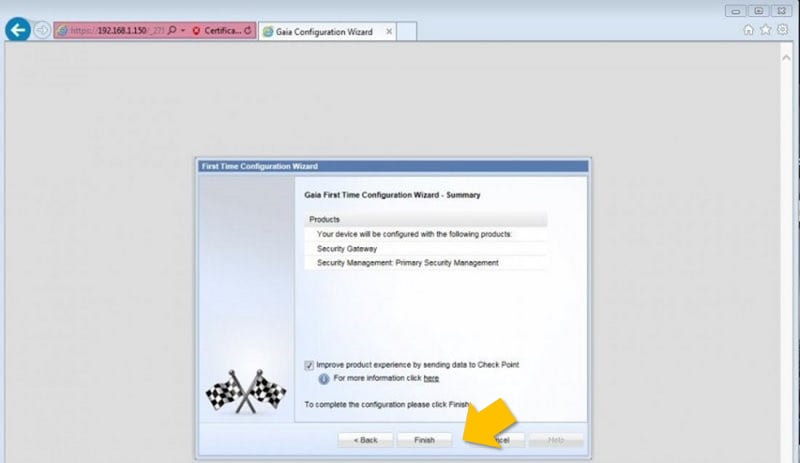
Step 29 Setup has been completed and we can select Finish Tab.
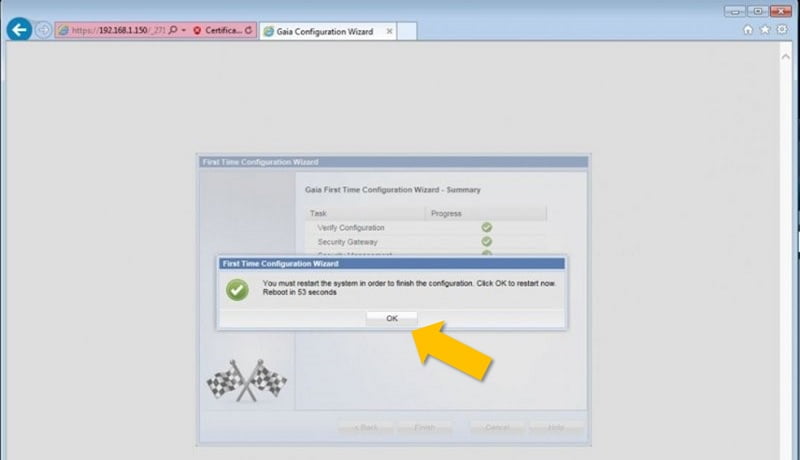
Step 30 Please select YES to save the changes in device and then all new configurations will be applied to the device.
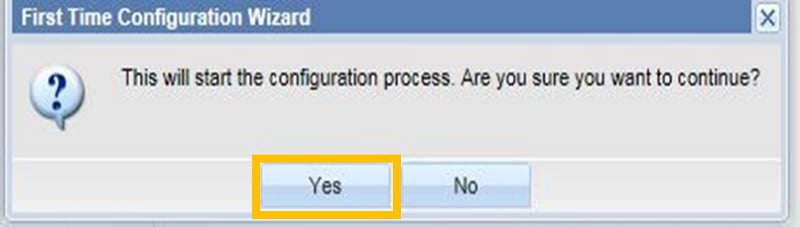
Once you Click Yes, the system will be restarted again.
No comments:
Post a Comment