What is NAT Reflection?
We use Hairpin NAT or NAT reflection when our aim is to access an internal server from an internal workstation of a client by being able to access the Public IP that would be bound to an external interface on any firewall.
NAT reflection divides external and internal networks in a way that external users redirect to the Public IP address of server and Internal users can directly access server via internal IP address. In other words, a client from an internal network uses an external IP/Public IP address of the server to access the application, NAT reflection can rewrite the traffic so that the user’s traffic reaches the internal server via internal route without taking an external interface path which improves access speed and decreases load on firewall.
Let’s discuss above image to understand NAT reflection.
- User is trying to access server 192.100.1.10 from inside network
- 192.100.1.10 is public IP address of 100.0.0.10 server which resides in same network where user PC is connected
- User traffic reaches to Firewall for 192.100.1.10,
- Firewall checks that server public IP address is bind with internal IP address 100.0.0.10
- So, instead of sending traffic via external route firewall redirect traffic to internal route
- And traffic takes a U-turn to reach private IP address of server
- That’s why it is called Hairpin or Loopback NAT
In short, source address and destination address will be changed/modified by Firewall NAT feature so that devices can accept traffic to and from the correct locations.
Return traffic must reach the correct private IP address through the Firewall interface. And security policy must be placed for the correct source and destination to allow intra-zone communication between client and server.
Let’s take different scenarios where we can implement NAT Reflection in Firewall. (FortiGate Firewall)
CASE STUDY 1: When User and Webserver behind the DIFFERENT Firewall interface
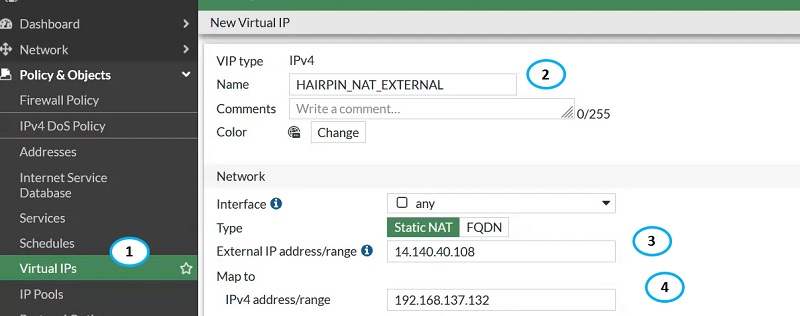
Configure Virtual IPs for Hairpin network
- Go to Virtual IPs option
- Name Virtual IP
- Give External Public NAT IP address
- Map to Server Private IP address
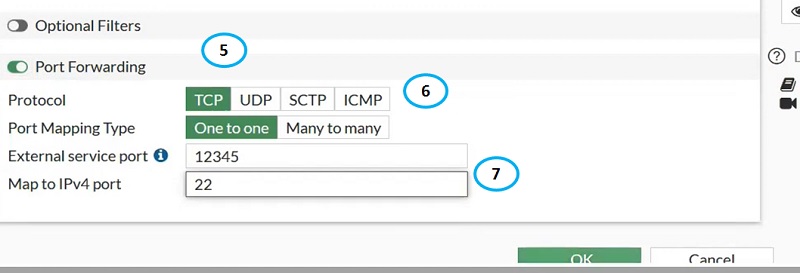
- Enable Port forwarding
- Select Protocol TCP
- External Port any random port range and Map to IPV4 Port 22. Click OK

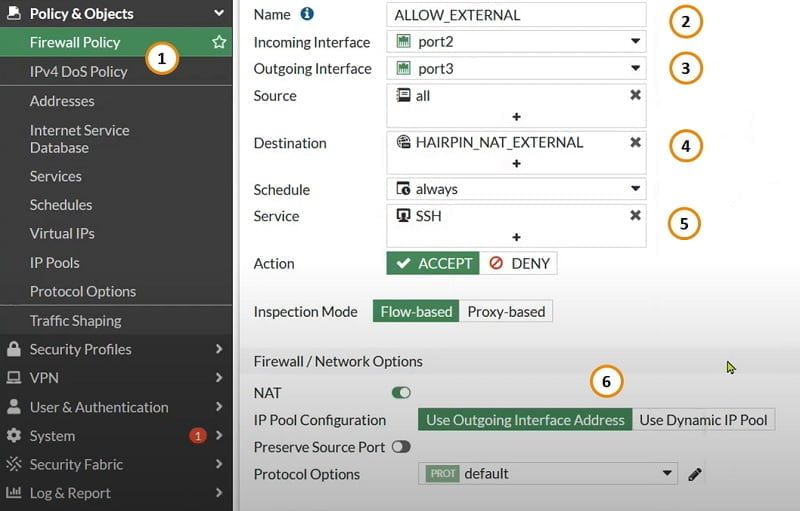
Now first create external access of server to Public IP address
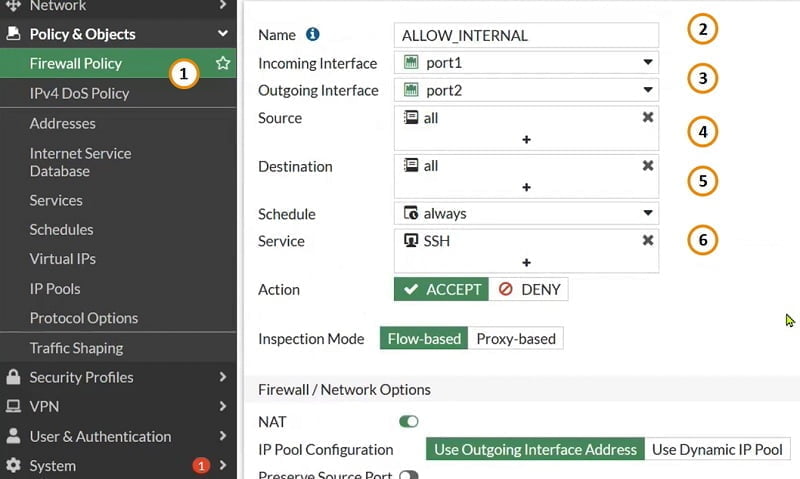
- Go to firewall Policy
- Name firewall policy
- Select inside and outside port for connection
- Select Source Any/All and destination VIPs which we have created above
- Select services which you want to allow
- Use outgoing interface and Click OK
Now our aim to move traffic of internal user from Port 1 -> Port 2 and then further Port 2 -> Port 3
First create Policy to enable access from Port 1 to Port 2 from internal Client
- Create Firewall policy
- Allow access from port 1 to port 2
- Select source Any and destination any
- Service SSH
- Action Accept
- Select OK
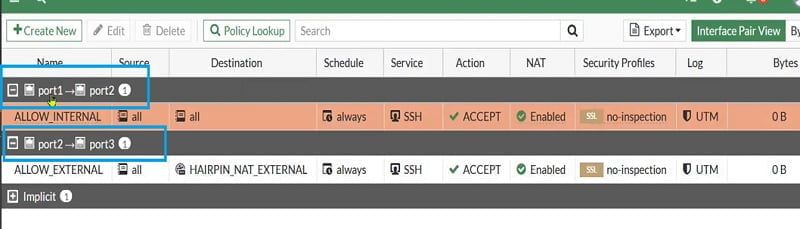
Now we have policy from Port1-> Port 2 and Port 2 -> Port 3
When user trying to access the server by using its public IP address from Internal segment then below output will receive in Firewall logs.

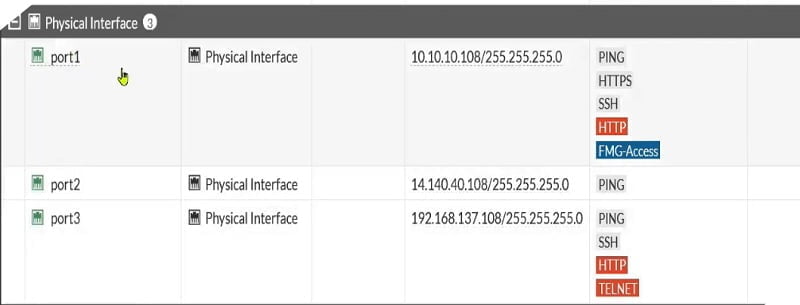
CASE STUDY 2: When User and Webserver behind the SAME Firewall interface
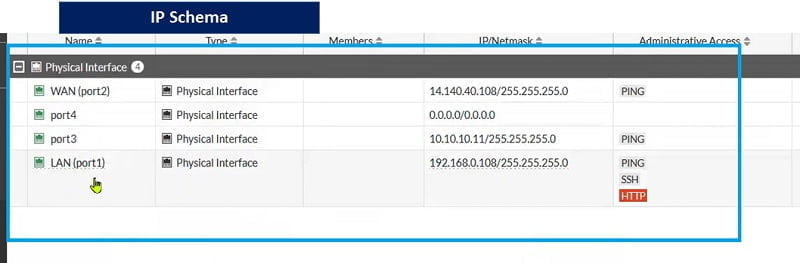
Now you can check Web Server IP address 192.168.0.100 and Client subnet range 192.168.0.0/24
Here Client initiate connection to Port 1 and then traffic redirect to Port2 from where traffic forwards to Web Server again on Port 1
Internal Port 1 Connected to LAN-> Port 2
External Port 2 Connected to Internet-> Port 1
Let’s configure the Hairpin NAT for this case.
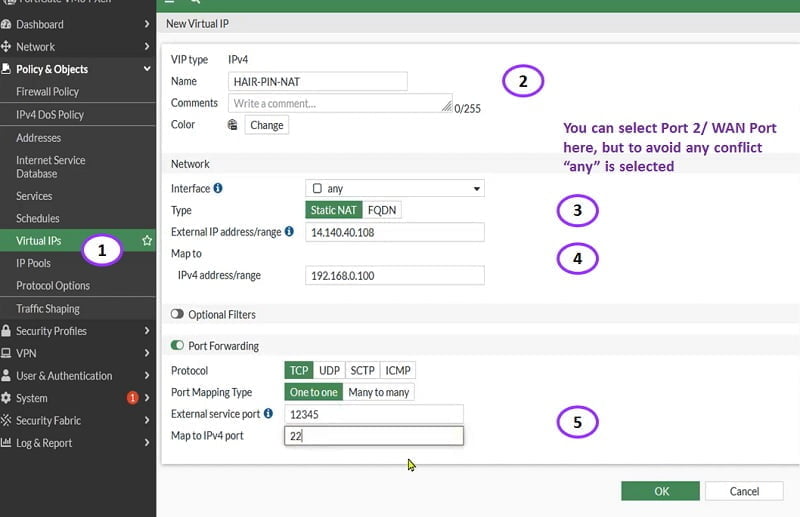
- Create VIPs in the FortiGate Firewall
- Assign Name to the VIP Policy
- Select Interface
- Add external IP (Public IP) values and Mapped IP address in the tab
- Enable port forwarding if requires in your network and click OK

Then Create Firewall policy and add below parameters to enable access.
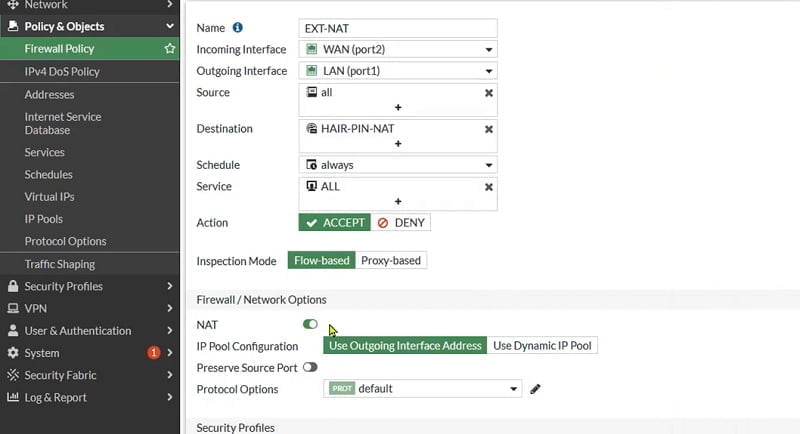
Enable NAT so that external users can also access the internal web server.

Now we will create another firewall policy which allows traffic from Internal network to Port 2 and from External Port 2 to Internal NAT server IP.
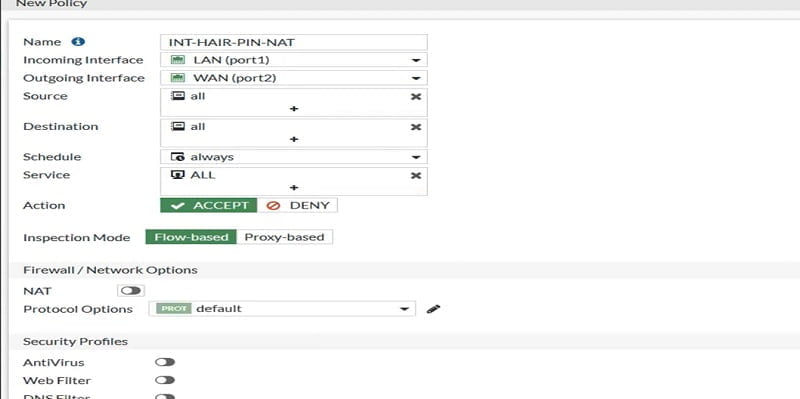
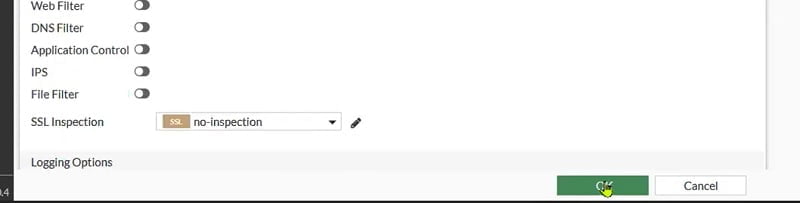
Here we disable NAT in the policy as communication doesn’t require translation from Internal Client to Internal web server.
Click OK
External NAT and HAIR-PIN NAT Policy will look like as below.


NAT Reflection is now introduced in many other firewalls as well which includes Juniper SRX series, Cisco ASA and Checkpoint Firewall. It’s the simplest way to access an internal server by an internal Client via Public IP address.
No comments:
Post a Comment