The following guide will take you through the installation of SCCM 2012 R2 with a simple Primary Server approach and with the SQL server located on the same device. It assumes that no earlier version of SCCM is installed in the Active Directory domain it is being installed into.
Before installing SCCM 2012 R2 you will need to run through some prep work to get the Active Directory configured and extended, along with some application and role/feature installs
Prepare Active Directory for Configuration Manager
Create the System Management Container in AD
Connect to a domain controller and load ADSI Edit. Under the System OU create a new Object.
Choose Container and click Next.
Enter the name System Management and click Next.
Complete the wizard and close ADSIEdit.
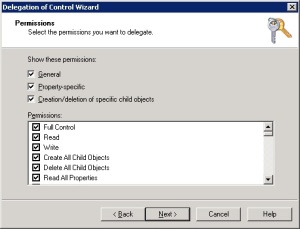
Delegate control to the SCCM site server to the newly created container in AD Users and Computers. Create a custom task to delegate and choose ‘This folder, existing objects in this folder and creation of new objects in this folder’
Check all Permission boxes and complete the wizard
Extend the Schema
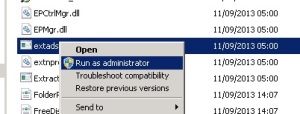
From the SCCM 2012 media copy the \SMSSetup\Bin\x64\ folder to a Domain Controller holding the Schema Master Role. Ensure the account used is a member of the Schema Admins group in AD. Right click the Extadsch.exe and choose ‘Run as Administrator ‘.
A log file ‘ExtADSch.log’ will be generated on the root of the C: Drive. Check for the entry ‘Successfully extended the Active Directory schema.’
<01-01-2014 21:25:22=""> Successfully extended the Active Directory schema.
To check what Extadsch.exe is doing to the Active Directory then open up the fileConfigMgr_ad_schema.ldf that is located in the same folder.
Install Site Server Prerequisites
The following roles and features need to be installed onto the SCCM Site Server prior to installation:
- BITS
- Remote Differential Compression
- IIS Components
- .Net Framework 3.5
Add the following IIS components
| Common HTTP Features
Static Content
Default Document
Directory Browsing
HTTP Errors
HTTP Redirection
Application Development
ASP.NET
.NET Extensibility
ASP
ISAPI Extensions
ISAPI Filters
Health and Diagnostics
HTTP logging
Logging tools
Request Monitor
Tracing
Security
Basic Authentication
Windows Authentication
URL Authorization
Request Filtering
IP and Domain Restrictions
Performance
Static Content Compression
Management Tools
IIS Management Console
IIS Management Scripts and Tools
Management Service
IIS 6 Management Compatibility
IIS 6 Metabase Compatibility
IIS 6 WMI Compatibility
IIS 6 Scripting Tools
IIS 6 Management Console
|
Install Windows Assessment and Deployment Kit (Windows ADK) for Windows 8.1
Go to http://www.microsoft.com/en-gb/download/details.aspx?id=39982 and download ADK 8.1.
Run the adksetup.exe file. Accept the licence agreement. This will download and install .Net Framework 4.5.
Restart the system when prompted.
After the restart setup will resume. Accept the default location for installation and click Next.
Select whether to join the CEIP and click Next.
Accept the licence agreement.
Install the following components and then click Install.
- User State Migration Tool (USMT)
- Windows Deployment Tools
- Windows PreInstallation Environment (Windows PE)
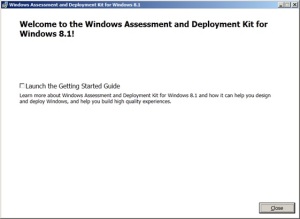
Once complete click Close.
Install SQL Server
SQL Server 2012 SP1 is being installed as the SCCM database.
Run the setup.exe
Install a new stand-alone installation of SQL
Click Ok.
Install the product key or run in evaluation mode. Click Next.
Accept the licence agreement and click Next.
Include any product updates. Click Next.
Click Next.
Choose the feature installation and click Next.
Install the selected features and click Next.
Click Next.
Leave as the default instance and click Next.
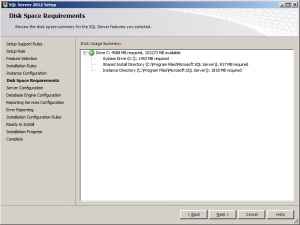
Click Next at the disk space requirements screen.
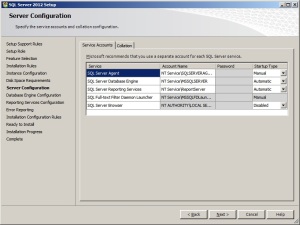
Set any account to run the SQL services, in this instance the defaults have been selected. Once confirmed, click the Collation tab.
Click the Customize button.
Choose the ‘SQL Collation, used for backwards compatibility’ option and choose SQL_Latin1_General_CP1_CI_AS. Click Ok. Click Next.
Use Windows authentication and Add the current user. Click Next.
Set Reporting Services to install only. Click Next.
Set error reporting preferences and click Next.
Click Next.
Click Install to begin the installation process.
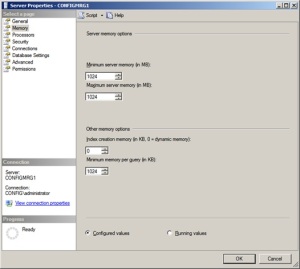
Once installed open up SSMS and limit the amount of RAM SQL can use to 50% of total RAM. Set the value for both max and min.
Set SQL to run with either a named domain account, network service or local system account. If using a named account grant the log on as a service right via gpedit.mscor GPO.
Install SCCM 2012 R2
Begin the install of SCCM 2012 R2 by running splash.hta. Click Install.
Click Next.
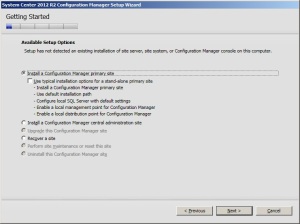
Choose to install a primary site in this instance. Click Next.
Enter a licence key or evaluate. Click Next.
Accept the licence agreement and click Next.
Accept pre-req licences and click Next.
Create a folder to store install updates and point the SCCM install to that location. Click Next.
Updates will download and install.
Select any language requirements for the SCCM server and click Next.
Select any client language requirements and click Next.
Enter a 3 digit site code and description and click Next. Be aware of Microsoft list of pre-reserved site code names. http://support.microsoft.com/kb/279868/en-us
Choose whether to run the primary as stand-alone or join to an existing hierarchy. Click Next.
In this instance a stand-alone primary is being installed. Click Yes to accept.
Accept the database default configuration and click Next.
Specify the path to the SQL database file and log file. In this instance it is the defaults. Click Next.
Click Next to set the current server as the SMS Provider
Set ‘Configure the communication method on each site system role’ as a PKI infrastructure is not being used. Click Next.
Install both a MP and a DP onto the site server. Click Next.
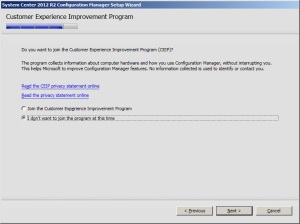
Choose whether to join the CEIP. Click Next.
Click Next at the Summary screen.
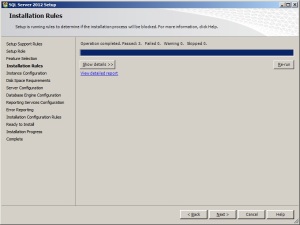
The following warnings can be ignored at the pre-req check screen. Click Begin Install.
SCCM will begin the installation.
Click close when complete.
Launch the SCCM Console. Ensure the site and database report as healthy in the Monitoring workspace under System Status>Site Status















No comments:
Post a Comment