Configure Kemp LoadMaster
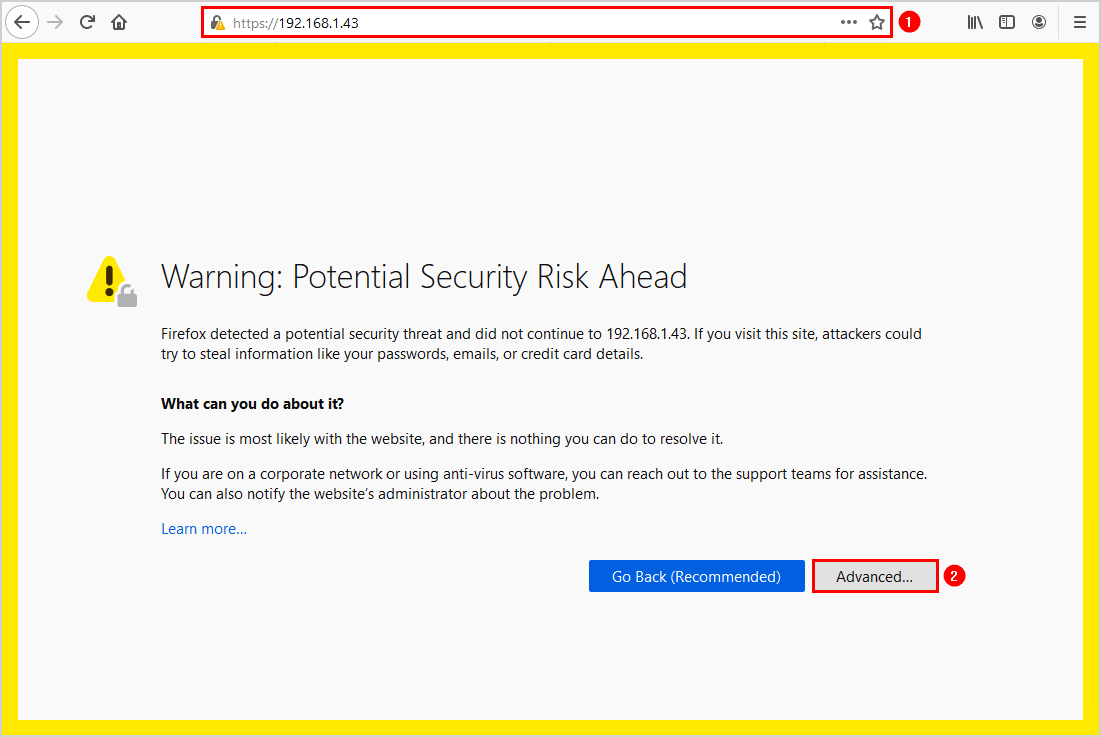
Start a web browser and navigate to the Kemp IP address. Insert the IP address that shows up in the Kemp LoadMaster console. In our example, it’s https://192.168.1.43. You will get a certificate warning, which you can accept.
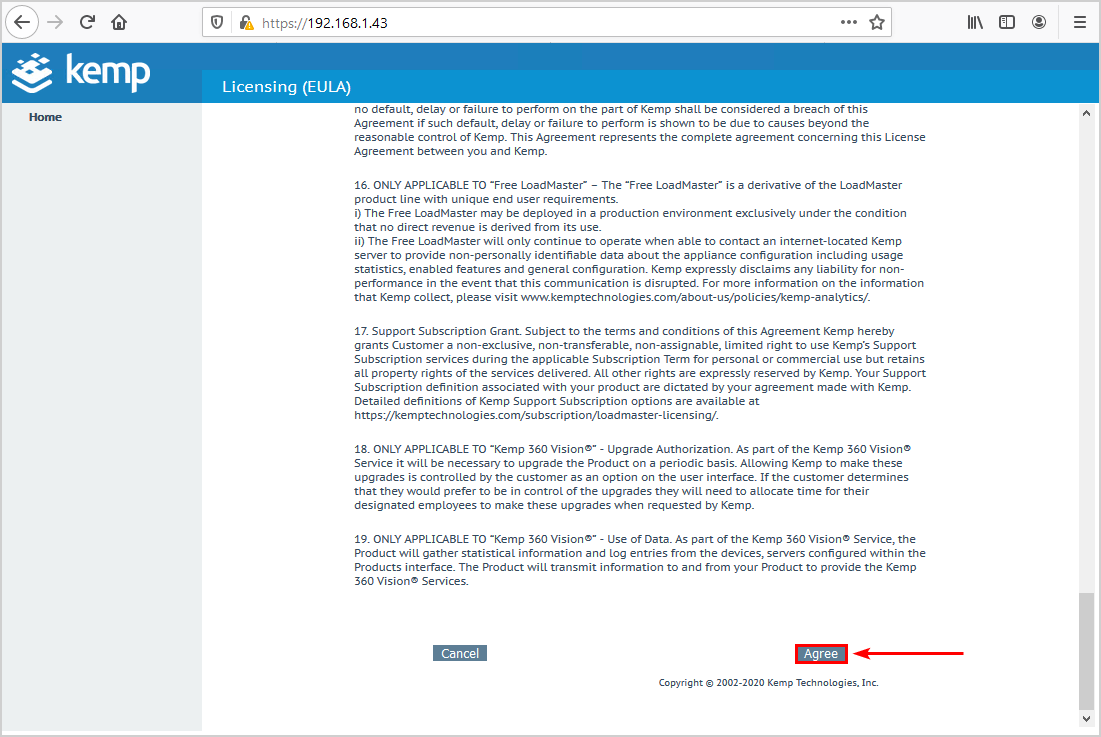
 Accept License (EULA)
Scroll down the page and Agree to the Licensing (EULA).
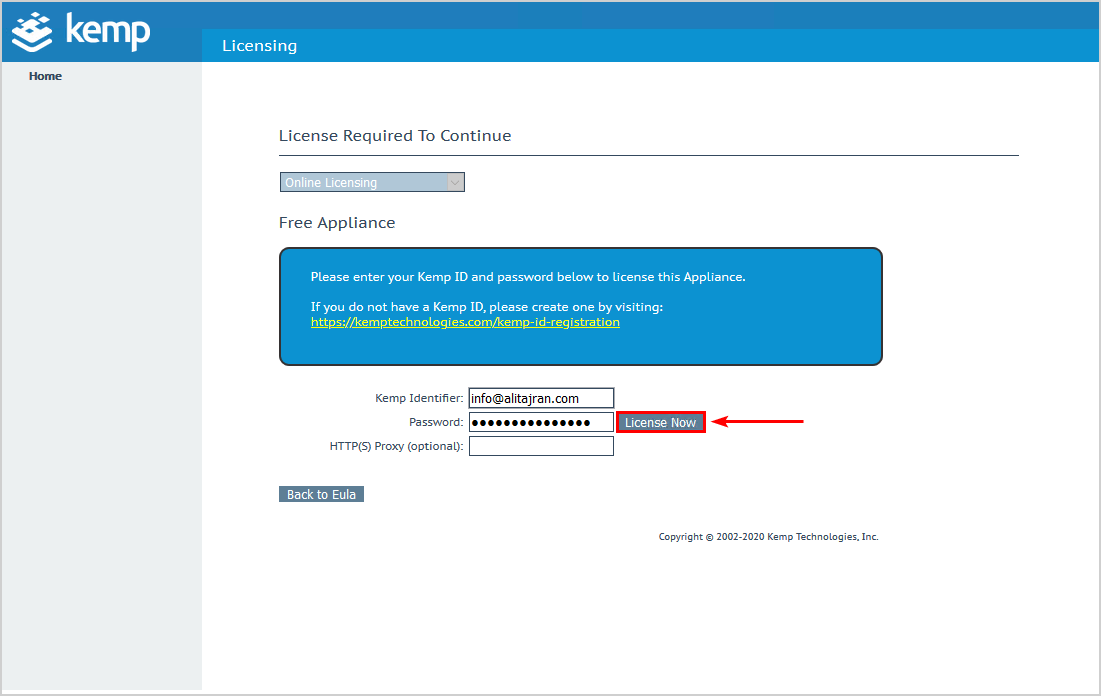
License Kemp LoadMaster
Fill in the email address and password that you did register on Kemp’s website. Click License Now.
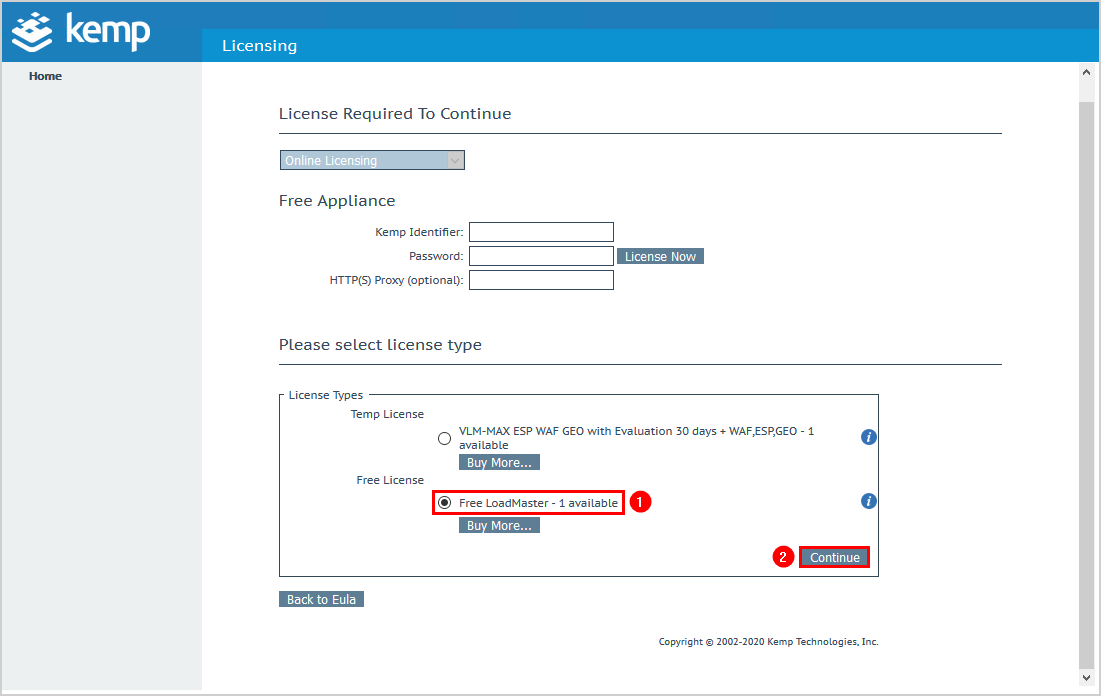
Kemp virtual load balancer will check for your ID in their system. You can choose if you want the 30 days trial or the free version. In our example, we did select the Free LoadMaster, which is Kemp’s free virtual load balancer. Click Continue.
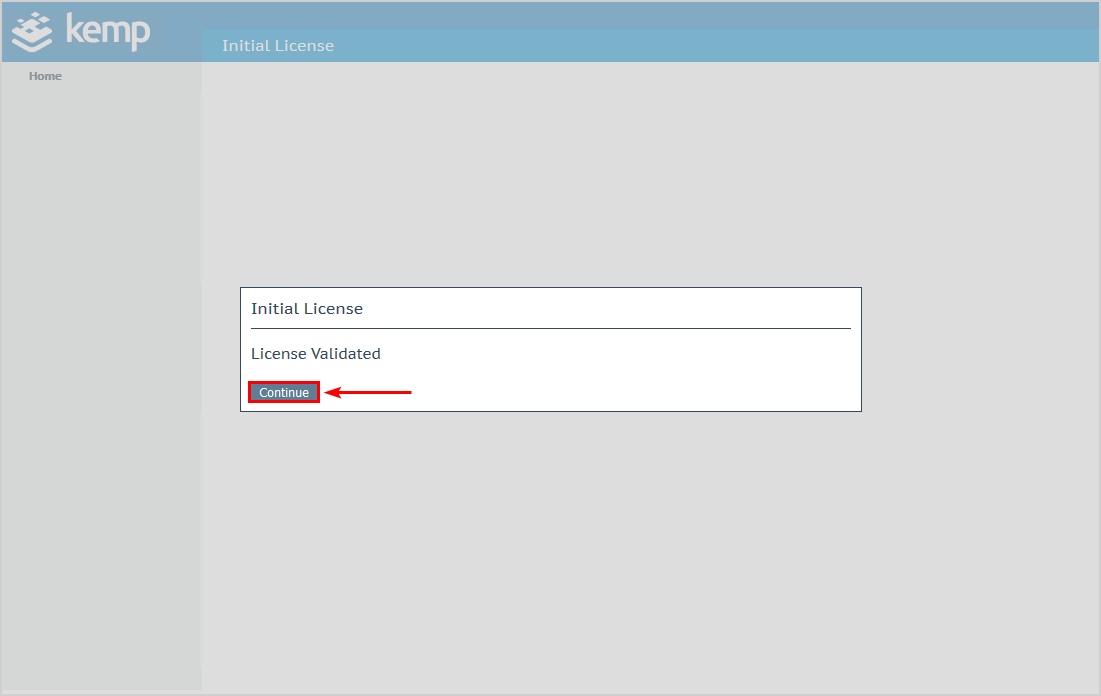
You will see the message that the license is validated. Click Continue.
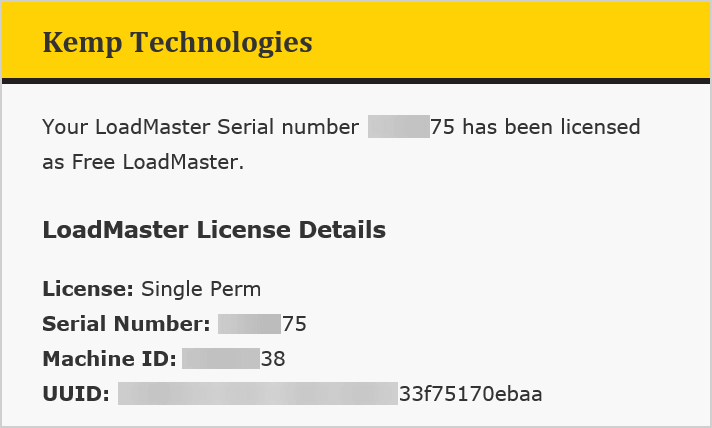
Kemp did send an email that the Loadmaster is licensed.
Set default account password
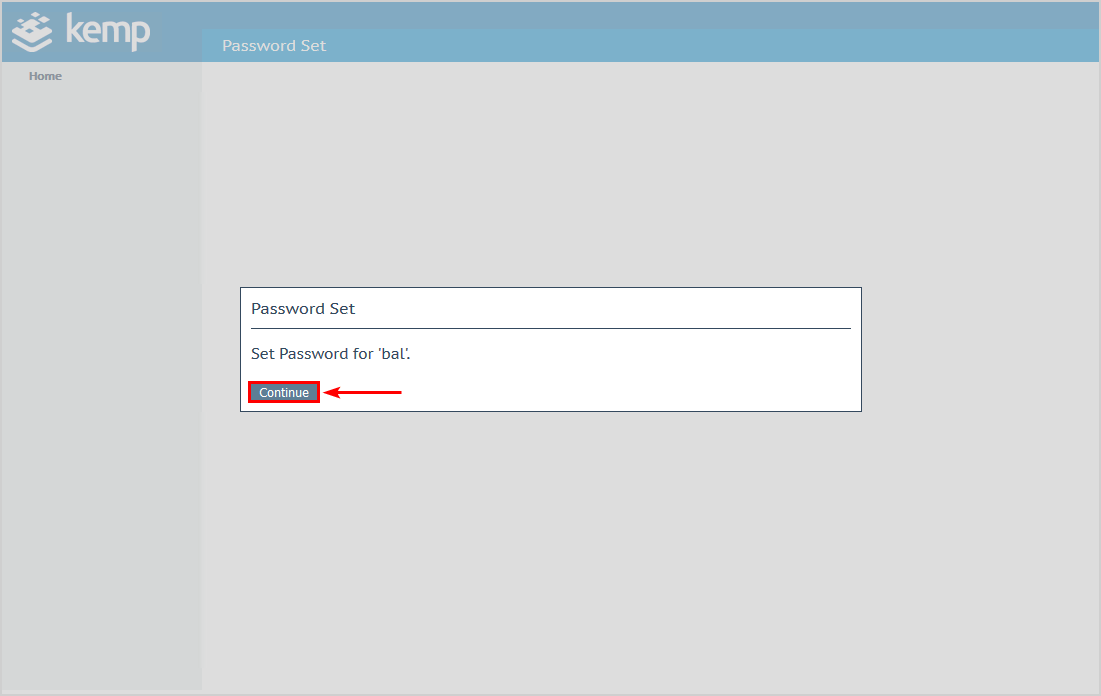
Configure a password for the default account “bal“. Click Set Password.

You did set the password for the default account “bal“. Click Continue.
Log in to Kemp LoadMaster
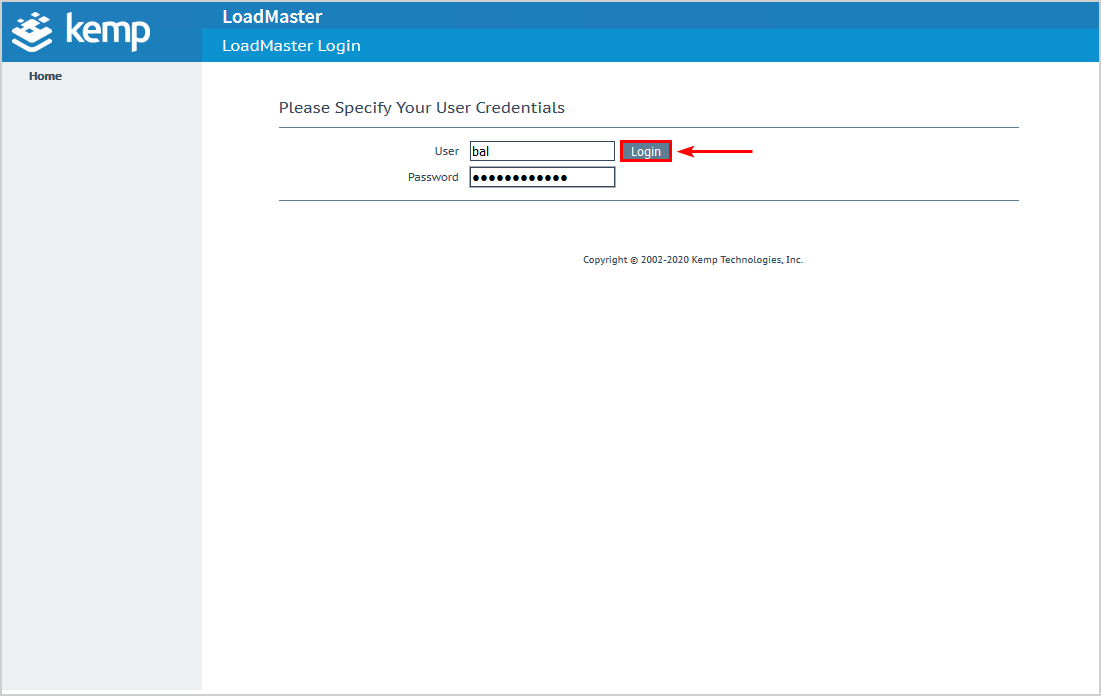
Specify the credentials and click on Login to enter.
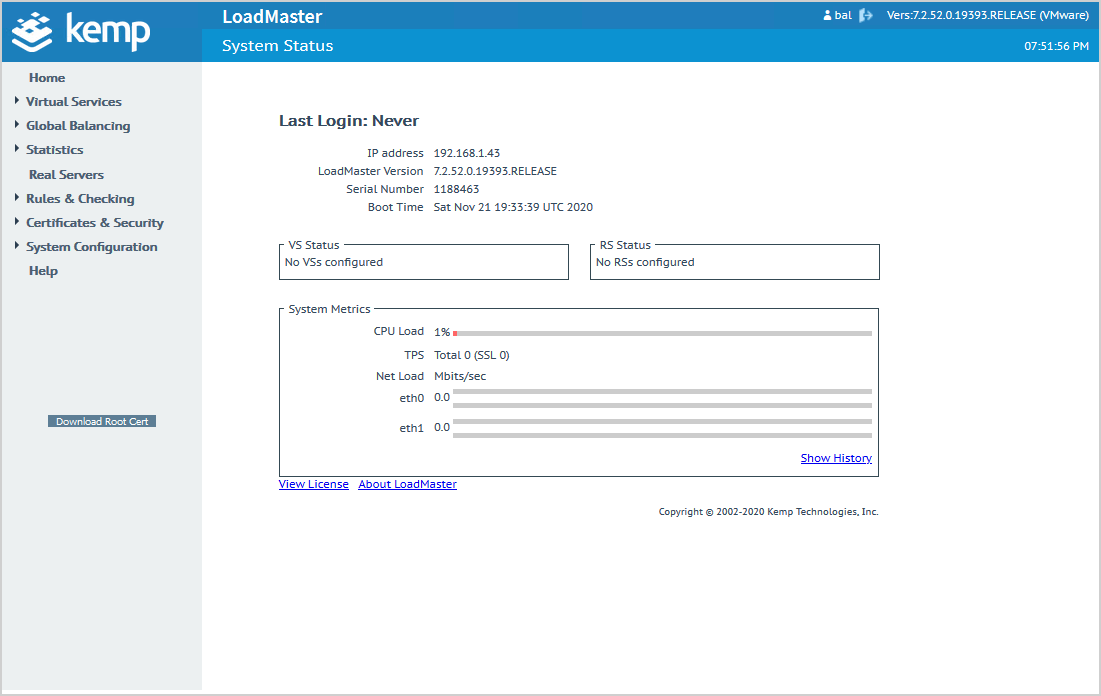
You will see the home screen of Kemp LoadMaster.
Set Kemp LoadMaster IP address
Change the IP address of Kemp LoadMaster. Click in the navigation menu on the left side of the screen on System Configuration > Network Setup > Interfaces > eth0. Type an available IP and click Set Address. We will deploy a one-arm configuration.
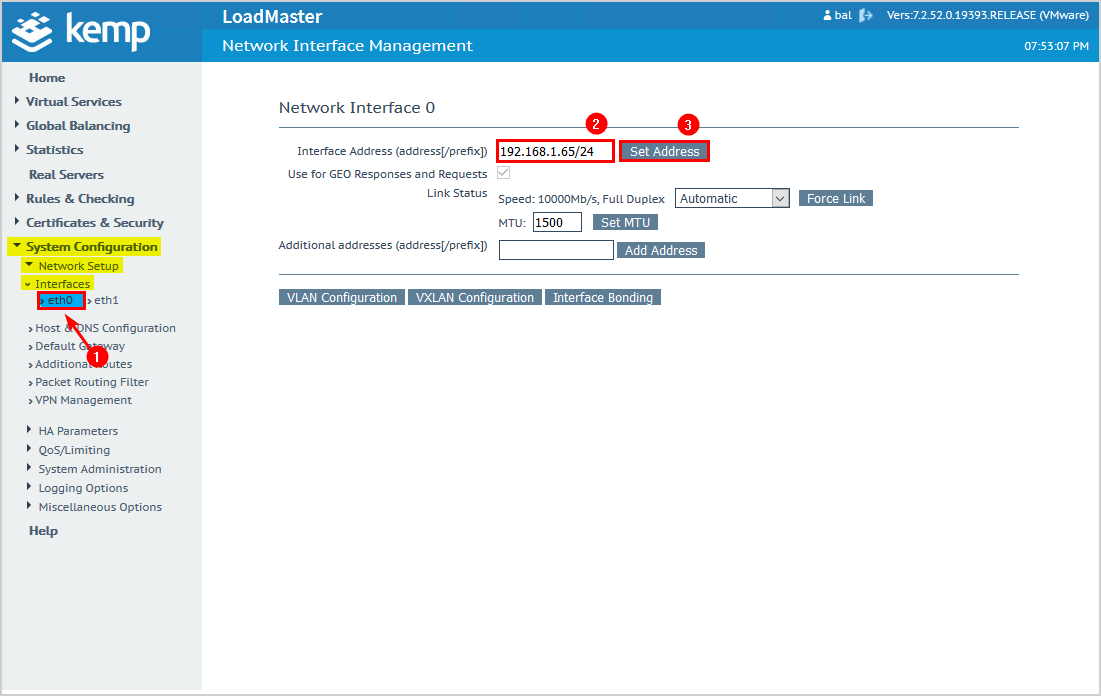
Reserve the IP address in the DHCP server. In our example, the Windows Server DHCP server is running on a domain controller. This way, you will not have another device that will take the same IP address as the Kemp load balancer.
Set Kemp LoadMaster hostname and DNS configuration
Click on Host & DNS Configuration in the left menu. Set a Hostname, for example, KLB01 (Kemp Load Balancer 01). After that, set the DNS NameServer (IP Address). In our example, it’s the Windows DNS server.
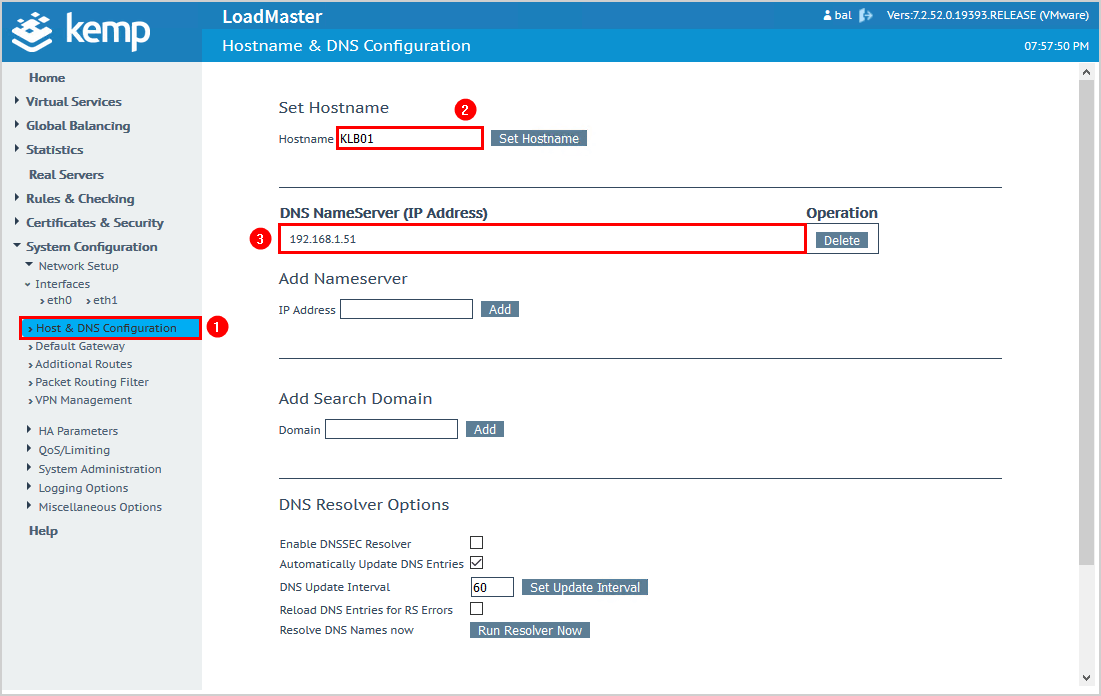
Add the Kemp virtual load balancer DNS hostname KLB01 to your DNS server. In our example, the domain controller got the DNS role installed. This way, you can always do a DNS lookup for the IP address. Verify that it works by pinging the Kemp load balancer hostname. You will get a response from the IP address.
Set Kemp LoadMaster Default Gateway
Click in the left menu on Default Gateway. Set the IPv4 default gateway address. Click Set IPv4 Default Gateway.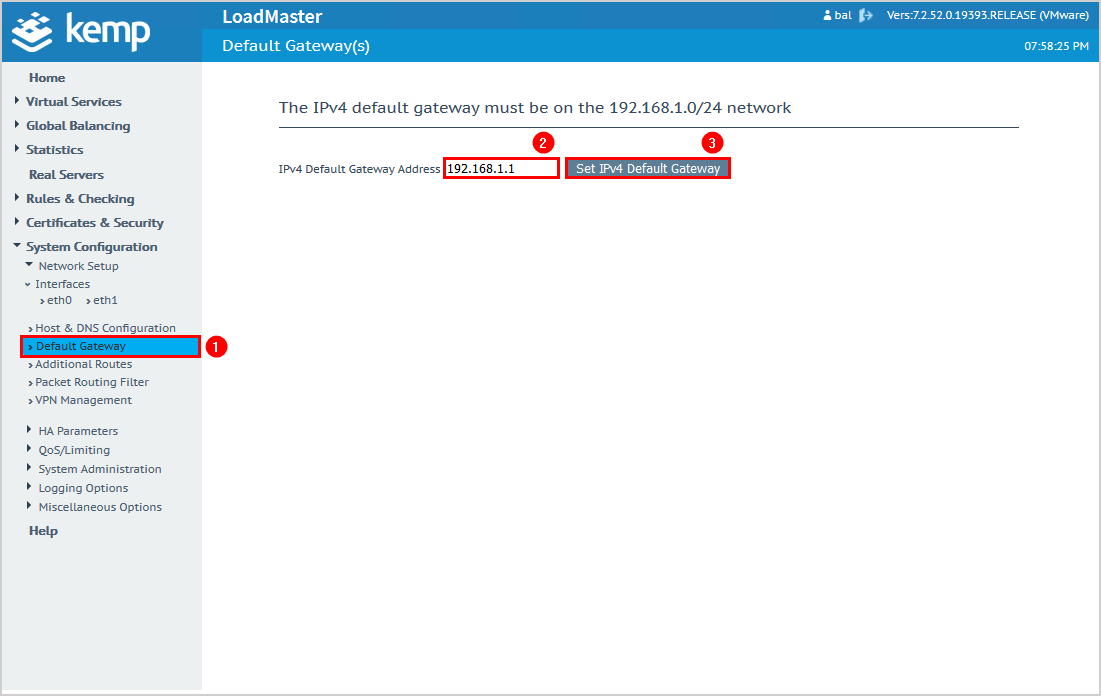
Set Kemp LoadMaster Date and Time
Click on System Administration > Date / Time. Set the time zone and click on Set time zone. You can use an NTP host if you like.
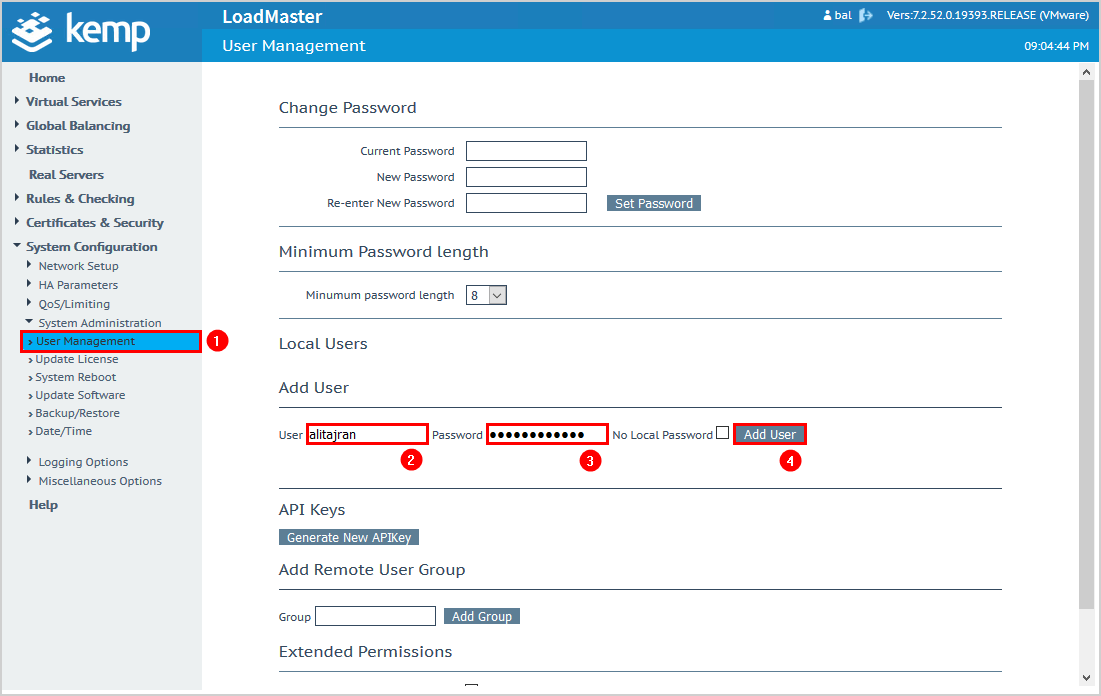
Add another user account
We recommend setting a second user account with admin rights. This way, you always have a backup just in case.
In the left menu, click on User Management. Add a username, password, and click Add User.
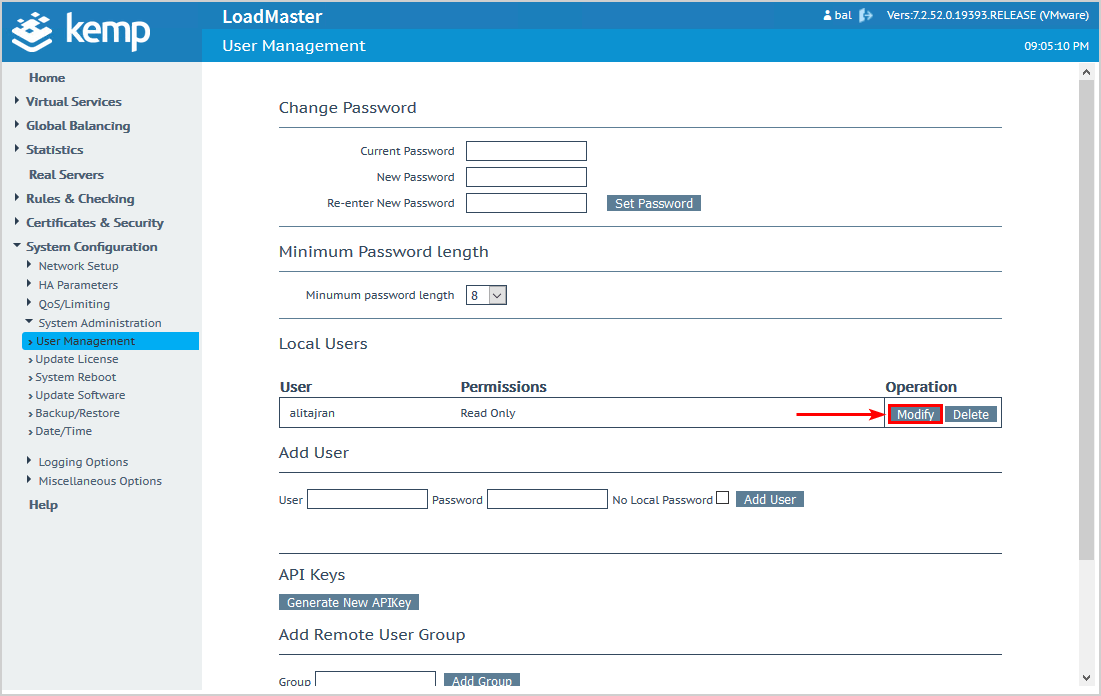
You can see the user with the permissions Read Only. Click on Modify.
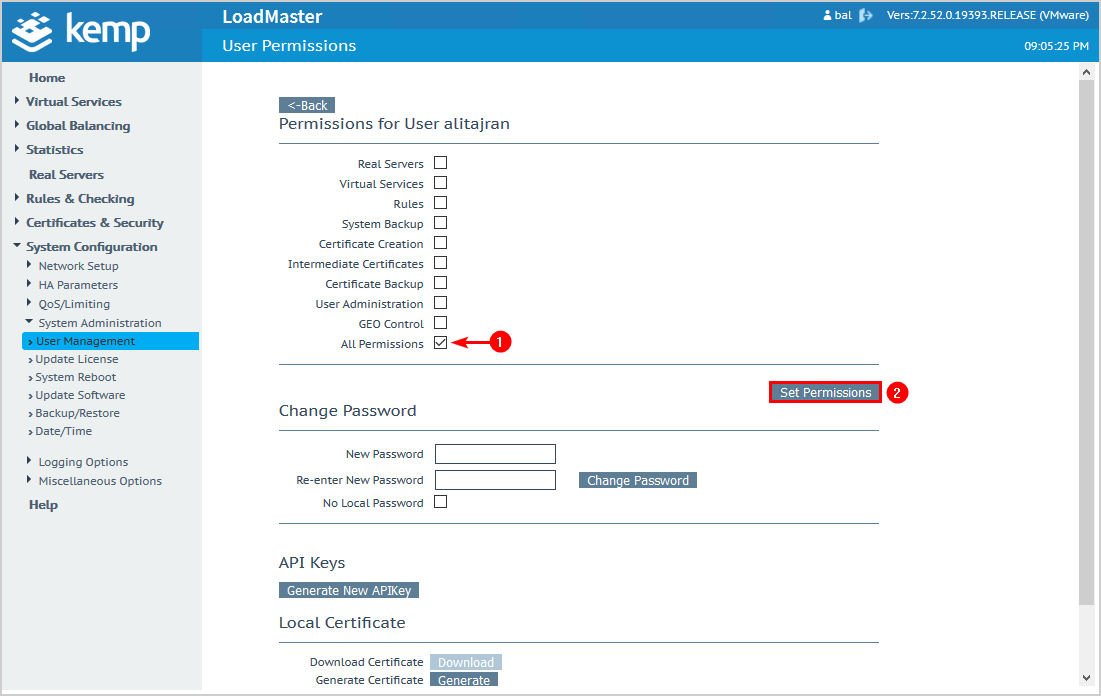
Select the checkbox All Permissions. Click on Set Permissions.
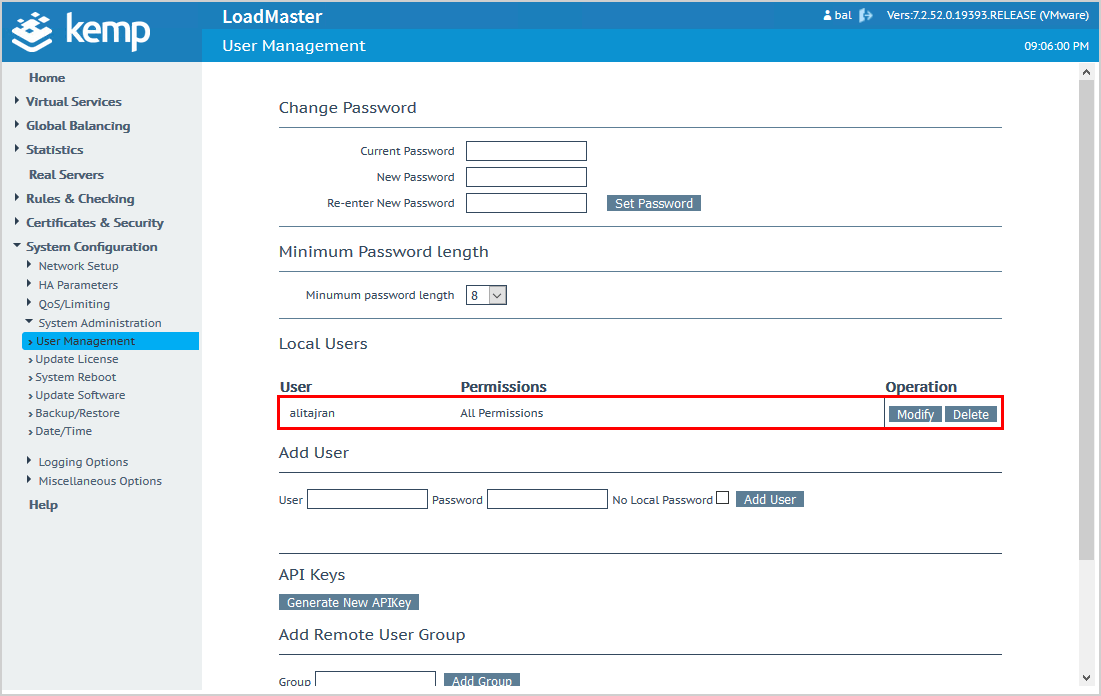
The user account is set with All Permissions.
That’s it. Everything is ready.
No comments:
Post a Comment