How to create a certificate in Exchange Server? It’s important to secure the connections to Exchange Server with an SSL certificate. Let’s look at how to generate a certificate request, complete the certificate request, and assign the services to the certificate. Use the same steps in this article to renew a third-party certificate in Exchange Server.
Create shared folder
Sign in to the Exchange Server. This can be the new Exchange Server or one that is already installed and configured. Create a folder on the (C:) drive and give it the name Certs. Right-click the Certs folder and share this folder.
Assign permissions to the folder:
- Your account (administrator) – Permissions Change/Read Allow
- SYSTEM – Permissions Change/Read Allow
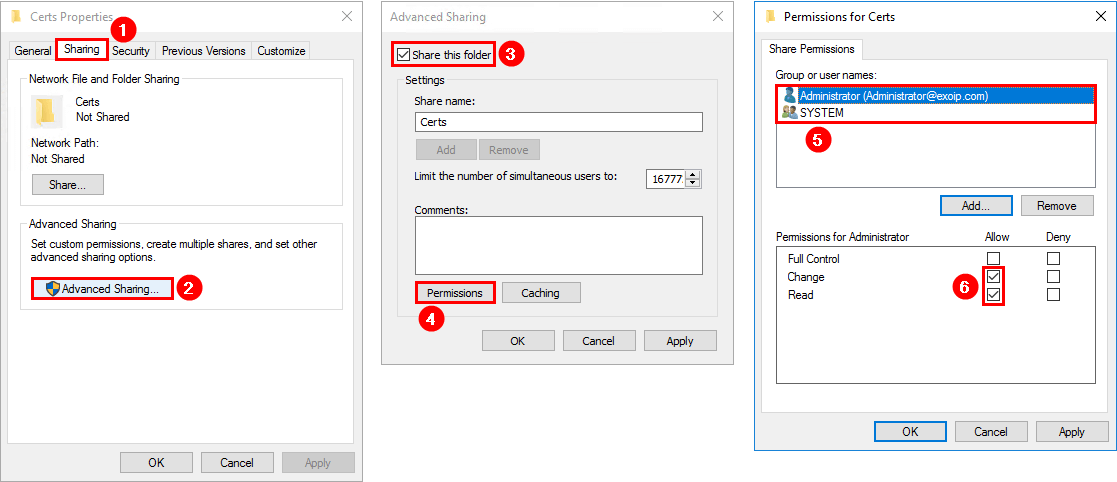
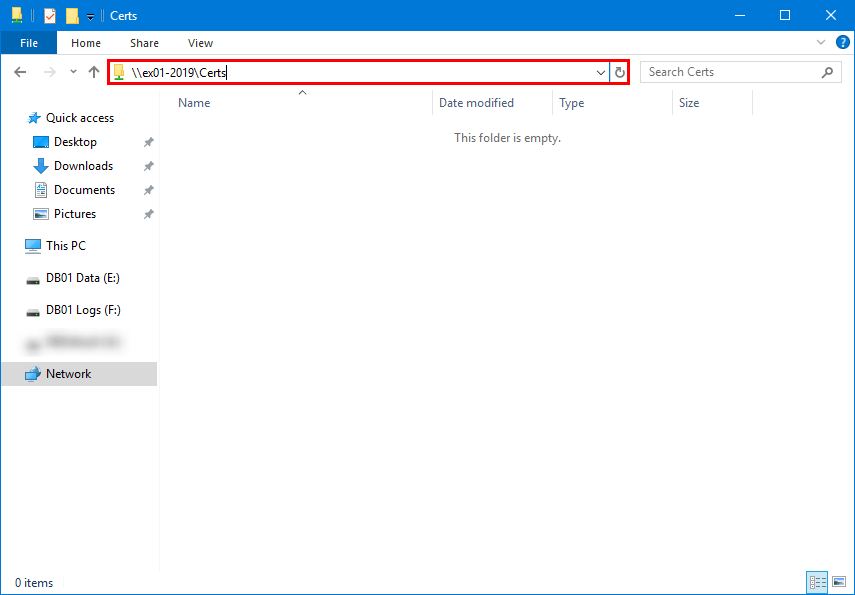
Browse to the shared Cert folder path and verify that you can open the folder before proceeding to the next step.
Create Exchange certificate
Starting from Exchange Server 2016 CU23 and later and Exchange Server 2019 CU12 and later, the only option to create the Exchange certificate is with PowerShell (Exchange Management Shell).
Note: To prevent misuse of UNC paths by attackers, Microsoft removed the parameters that take UNC paths as inputs from the Exchange Server PowerShell cmdlets and the Exchange Admin Center. These changes will affect all cumulative update (CU) releases of Microsoft Exchange Server 2019 (CU12 and later) and Microsoft Exchange Server 2016 (CU23 and later).
Generate an Exchange certificate request
Run Exchange Management Shell as administrator. Run the New-ExchangeCertificate cmdlet and fill in the details:
- Server: Specifies the Exchange Server to generate the request on.
- GenerateRequest: Prepares a 3rd party certificate request.
- FriendlyName: The friendly name of the certificate.
- PrivateKeyExportable: Allow you to export/import the certificate to other Exchange Servers.
- SubjectName: The subject field of the certificate request.
- DomainName: Specifies one or more FQDNs
Run the second command to export the certificate request to the shared folder.
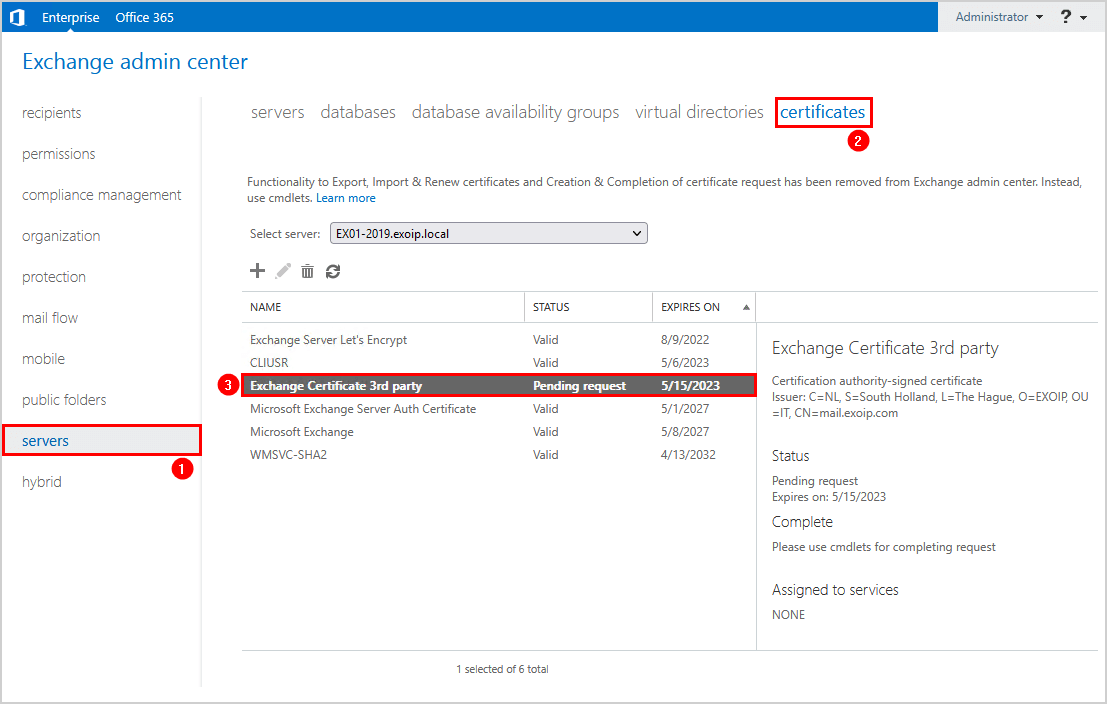
Sign in to Exchange Admin Center. Go to servers > certificates. Verify that you see the Exchange certificate with the Pending request status.
Process Exchange certificate request
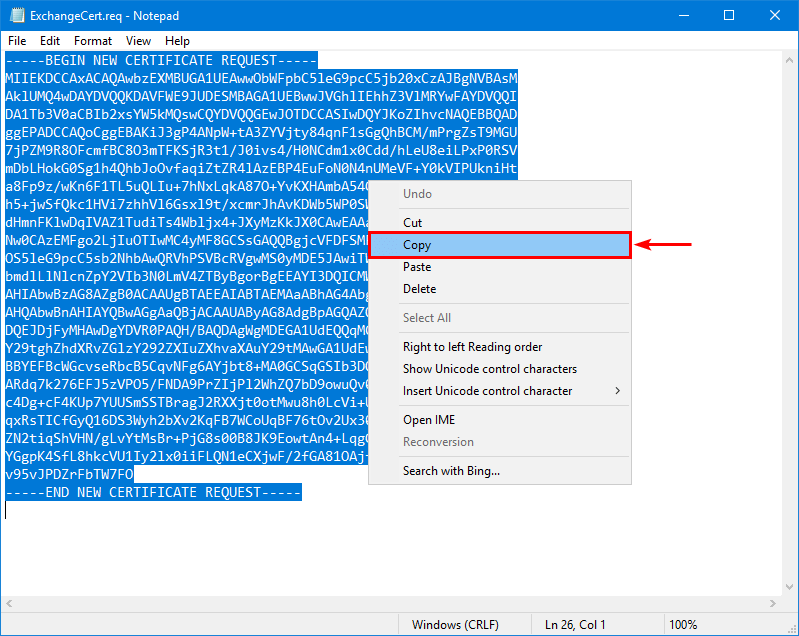
Go to the shared folder and open ExchangeCert.req with Notepad.
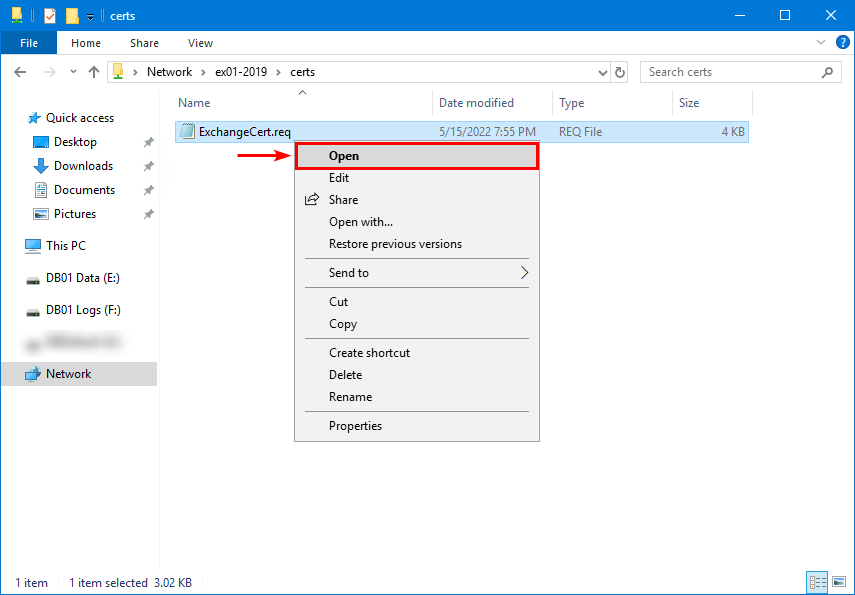
Next, copy the certificate request.
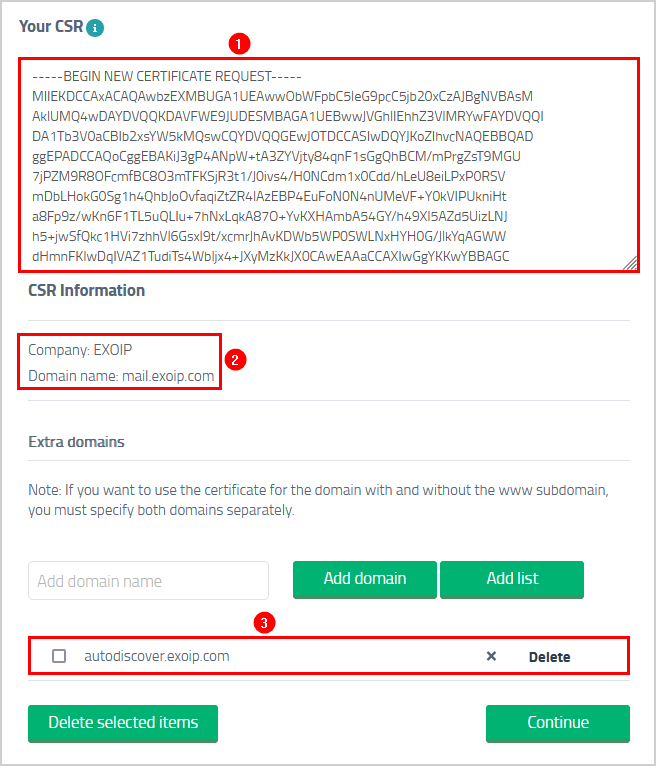
Sign in to the third-party Certificate Authority. This can be any of your choices. Ensure that you select a multi-domain certificate because you have more than one domain name in the certifica
Paste the copied certificate request and check that the CSR information is correct. It will show the company name and the domains.

Proceed further with the payment.
The Certificate Authority will ask you to validate the domain. This can be through an email sent to an email recipient listed on the domain registration or by adding a record in the public DNS.
Complete Exchange certificate request
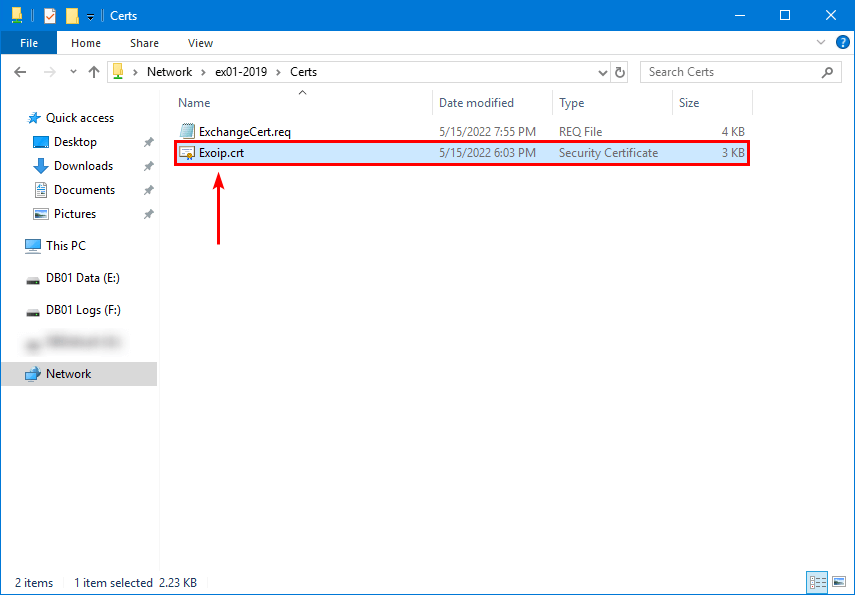
The certificate is ready for you to download from the Certificate Authority. Download and unpack the certificate from the Certificate Authority to the Exchange Server shared folder.
Give the certificate an accessible name. In our example, the certificate name is Exoip.crt.
Run the Import-ExchangeCertificate cmdlet to complete the pending certificate.
The Exchange certificate will show the status Valid.
Assign Exchange services to certificate
Double-click the certificate and copy the certificate thumbprint.
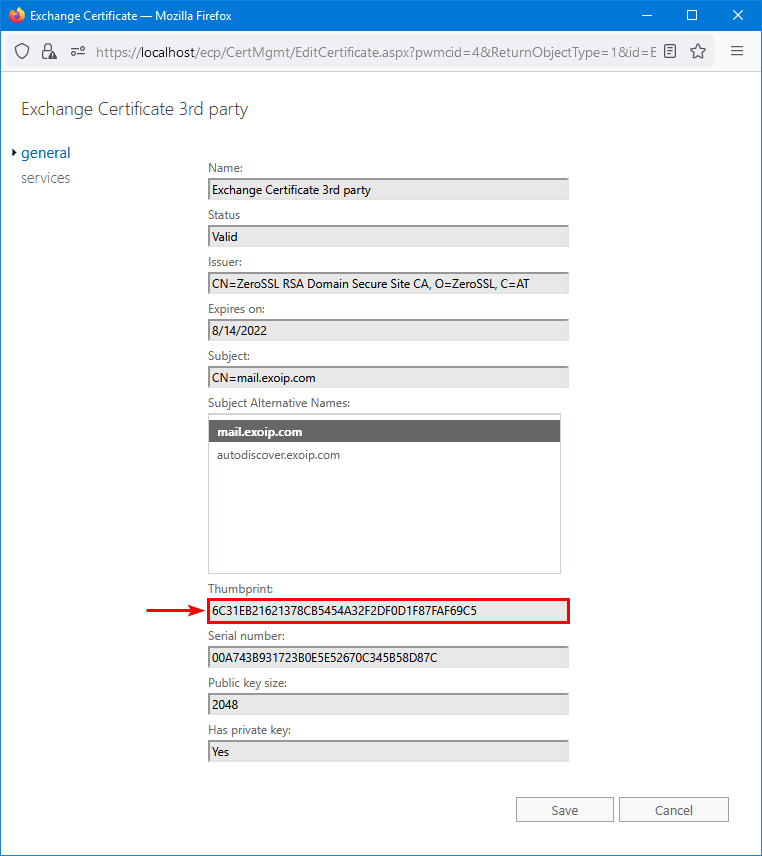
Run the Enable-ExchangeCertificate cmdlet to assign services to the certificate. Fill in the thumbprint value which you copied.
Restart IIS
Restart the Internet Information Services (IIS) on the Exchange Server.
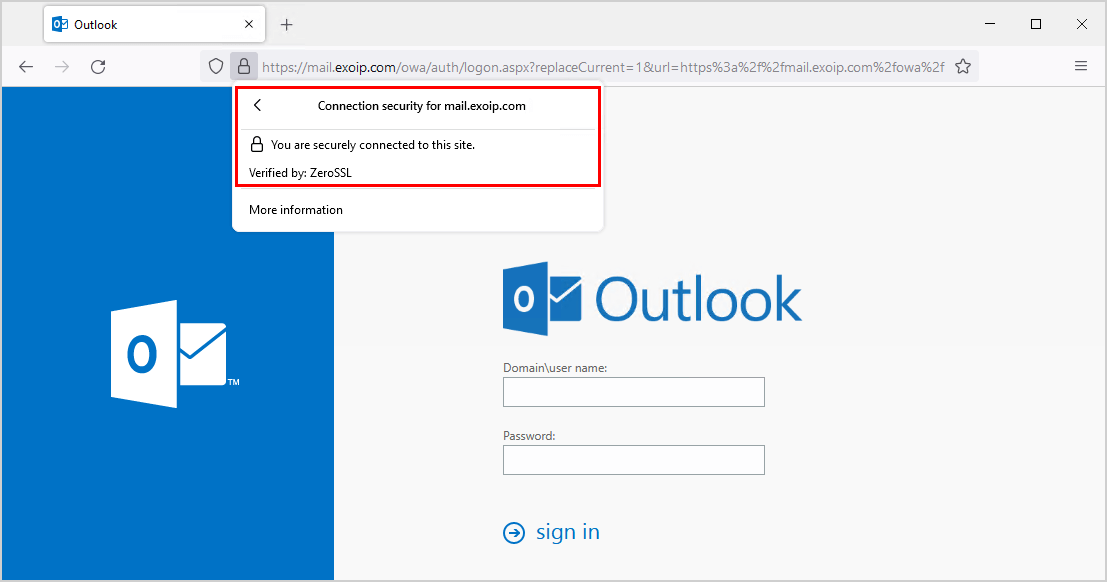
Verify new Exchange certificate
Go to Outlook Web Access (OWA) URL or Exchange Admin Center (EAC) URL. Verify that the website connection is secure. Also, check that the Outlook client starts without any errors.
Copy certificate to another Exchange Server
Suppose you have more than one Exchange Server. Then you don’t have to do all the steps again. Instead, you can export the certificate and import it to the other Exchange Servers
Conclusion
to create a certificate in Exchange Server. First, generate a certificate request. Next, complete the certificate request. As of last, assign the services to the certificate. The same steps apply when you want to renew an Exchange Server third-party certificate.
No comments:
Post a Comment