The following step by step tutorial will help you install windows 10 on Mac using Boot CampAssistant software by Apple.
Before you begin, make a full backup of your Mac using Time Machine that you can restore to in case anything goes wrong.
Requirements:
Up to date version of OS X running on a Mac with at least 2 GB RAM.
A minimum of 30 GB of free hard drive space on Mac.
Genuine Windows 10 Product Key
A minimum of 16 GB USB Flash drive to install Windows 10 with all the required Boot Camp drivers.
Windows 10 ISO File.
How to install Windows 10 on Mac:
Step 1: Launch Boot Camp Assistant. Do a Spotlight Search for it.
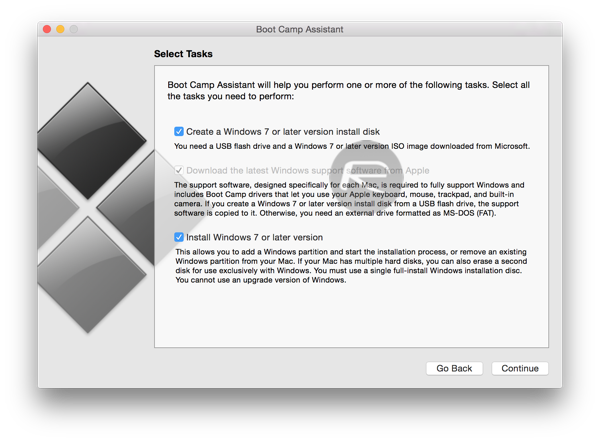
Step 2: Check both options under this ‘Select Tasks’ window as shown in the screenshot below.
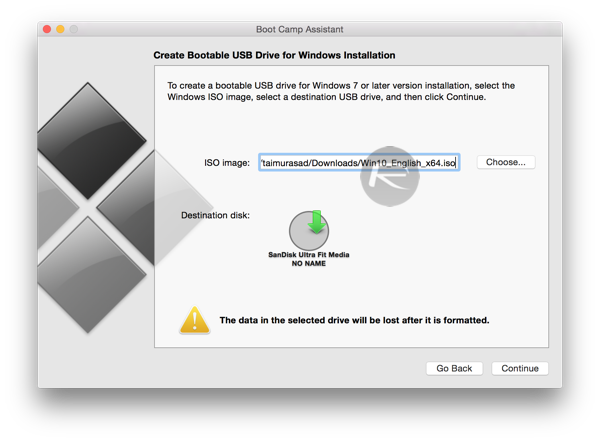
Step 3: Insert your USB flash drive and select your Windows 10 .iso file, as shown again in the screenshots.
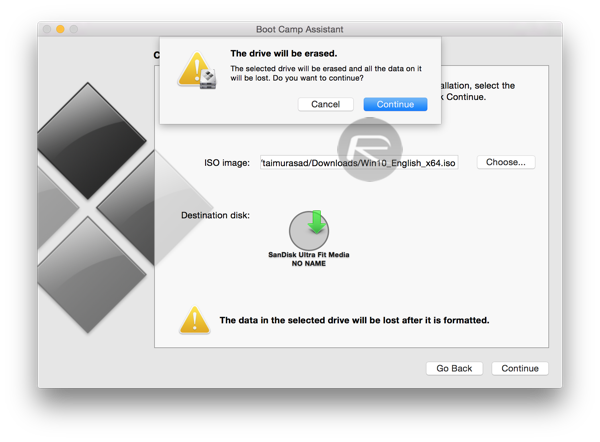
Step 4: Click Continue, you will get a warning saying your flash drive will be formatted. Click on Continue again.
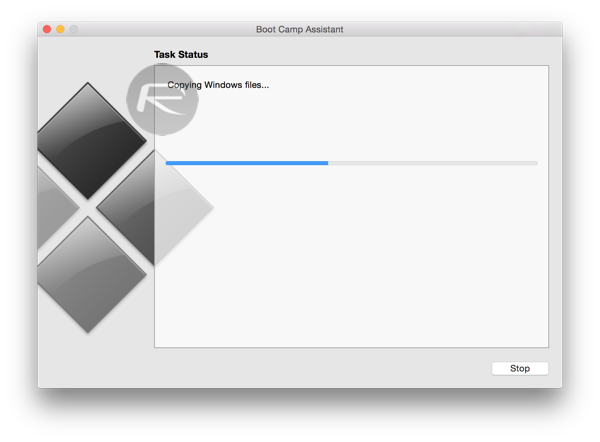
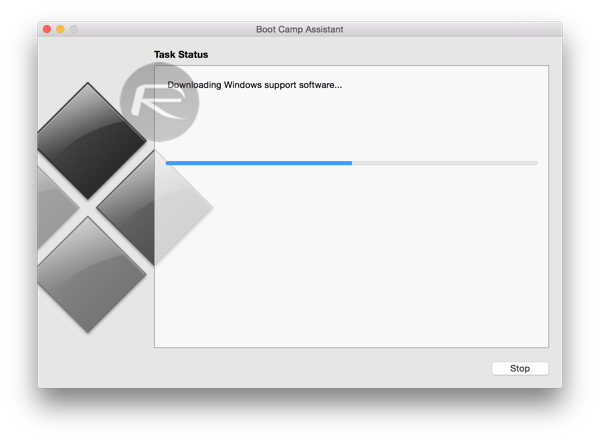
Step 5: Now sit back and wait for Boot Camp Assistant to copy all the required Windows Files and Boot Camp drivers to your USB drive. This could take a while depending on the speed of your Internet connection and your computer.
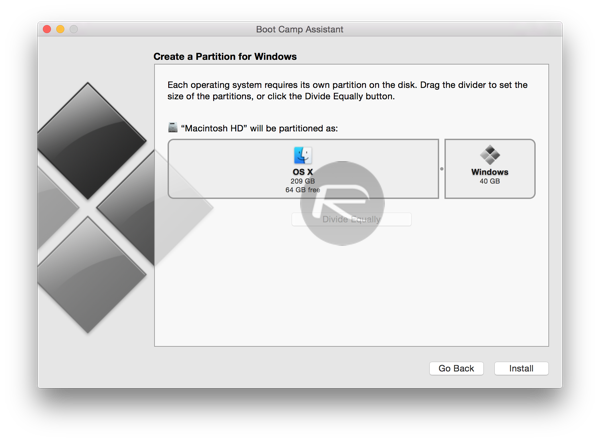
Step 6: Once the USB drive is ready, it will ask you to create a Windows partition. Select at least 30 GB for Windows 10 and then click on Install button.
Step 7: Boot Camp will now create the required partition and then it will reboot your Mac.
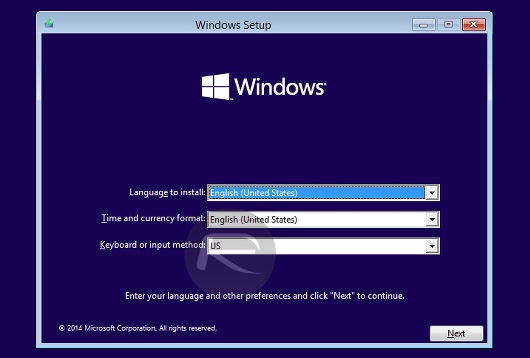
Step 8. On restart, you will be booted into Windows Setup screen.
Step 9: From here, enter your product key when asked, select your Boot Camp created partition when prompted on where to install Windows. Basically just follow the on-screen prompts to start Windows installation process.
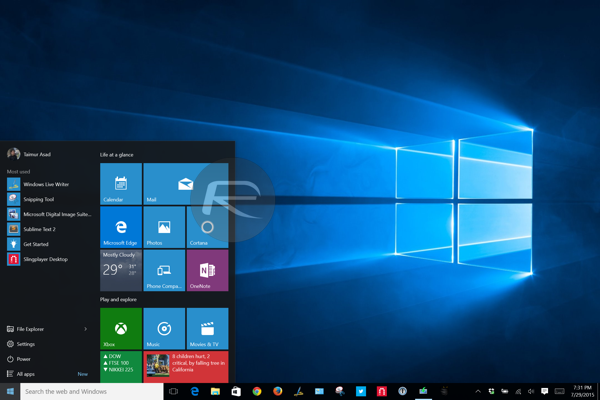
Step 10: Once Windows is installed, your Mac will automatically reboot right into Windows 10.
Step 11: Once you have set up your login account stuff and are in desktop, you will need to install Boot Camp drivers for your Mac. These are the same drivers which were copied by Boot Camp Assistant software to your USB in Step 5 above. Simply navigate to contents of USB flash drive from File Explorer and run setup.exe to install the required drivers for your Mac.
Step: 12: After the drivers are installed and your computer is rebooted, you should now have fully functional Windows 10 running on your Mac.
Dual-boot Windows 10 with OS X:
Now to dual-boot between the two operating systems, that is Windows 10 and OS X Yosemite, during Mac’s startup boot chime, press and hold option/alt key until you are presented with a menu to choose between Windows and Mac partitions, select your desired OS to boot into it.
Step 1: Insert the flash drive into your Windows computer and download Windows 10's media creation tool from Microsoft. There are 32-bit and 64-bit versions, depending on which Windows system you intend to use the tool on. If you're not sure whether your computer is using 64-bit or 32-bit Windows,here's how you can find out. Only the version compatible with your system will actually run.
Step 2: Open the downloaded media creation tool, choose Create installation media for another PCthen click Next.
Step 3: Select the Language, Edition and the 64-bitArchitecture for Windows 10, then click Next. It's important that you select the 64-bit Architecture, unless your Mac specifically supports only the 32-bit architecture (very few do). If you select the 32-bit or both option, you may run into problems later on.
As for what edition of Windows to get, check out this chart to find out if Pro or Home fits you best. Keep in mind that you will need to buy a license later when you need to activate Windows and the Pro edition is more expensive than the Home edition. The N edition of Windows 10 is for certain European markets.
Step 4: Choose to save Windows 10 installer as an ISO file then click on Next. Don't worry, you won't need a DVD burner or a DVD at all.
Note that you'll want to avoid using the USB flash drive option here since, in my experience, the Windows 10 USB installer drive created using Windows has trouble working on certain Macs.
Save Windows 10 ISO file.
Step 5: Choose a location to save the Windows ISO file. For this guide, I chose to save that file on the flash drive, but you can save it anywhere on the computer and then copy it onto the flash drive later.
Depending on your Internet connection, this will take between a few minutes and several hours. Once the file has been saved on the flash drive, remove it from your Windows computer and insert it into your Mac.
You will not need the Windows computer again for the rest of the process.
Part 2: Getting the flash drive and your Mac's partition ready
Note: At times you'll be prompted to type in the password for your Mac's admin account. Make sure you have that ready.
Copy Windows 10 ISO file onto the Mac's desktop
Step 1: Insert and then open the flash drive. Copy the Windows ISO file onto the Mac's desktop. Leave the flash drive connected to the Mac for the rest of job. Make sure there are no other flash drives or external hard drives connected to the Mac.
Run Boot Camp Assistant
Step 2: Run Boot Camp Assistant, then click on Continue. Boot Camp Assistant is located in Applications\Utilities folder. You can also quickly search for it using Spotlight.
Make sure all tasks are checked.
Step 3: Make sure all three tasks Create a Windows 7 or later version install disk, Download the latest Windows support software from Apple and Install windows 7 or later version are checked. Then click Continue.
Prepare to make Windows 10 install disk.
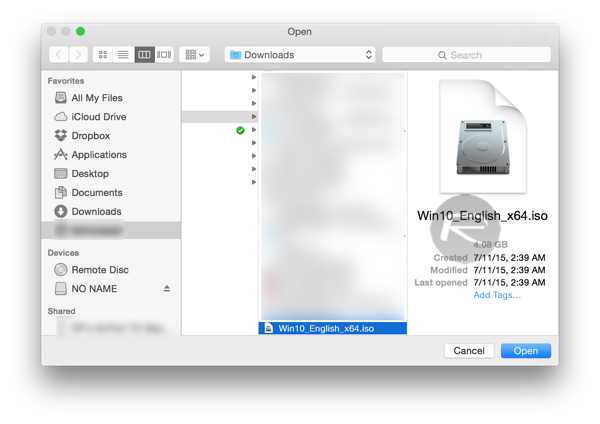
Step 4: If you've copied the Windows ISO file to the Mac's desktop, it will be automatically located. If you put it elsewhere on the computer, you'll need click on Choose and browse for it. The flash drive will be automatically chosen as the install disk if it's the only flash drive plugged in.
Verify everything then click on Continue. Boot Camp Assistant will then confirm the erasing of the flash drive before turning it into a Windows 10 install disk (make sure you have no important information on the flash drive.) After that it will also download the latest Windows support software onto the flash drive.
Make sure you choose the right partition size for Windows 10.
Step 5: Boot Camp Assistant will prompt you to choose the size of the partition that you'll use for Windows. Use the slider to select the size. Windows 10 itself requires at least 20 GB to install, so you'll want more than that to make room for software and data. Note that this is the only time you can pick the partition size for Windows so make sure you make up your mind before continue.
Once done, without removing the flash drive, click on Install. The partitioning will takes place and then the Mac will restart. This is the end of part 2. Make sure the flash drive remained plugged in for the entire part 3.
Part 3: Installing Windows 10
Windows 10 installation starts
Step 1: The Mac will automatically boot up from the flash drive and start the Windows Setup process. You'll be prompted to choose the Language, Time and currency format, and Keyboard settings for Windows. Do this, then click on Next.
Note: If somehow the Mac doesn't boot from the flash drive, just restart it, hold down the Option key after the Apple startup sound for available boot options, use the left/right keys to pick the flash drive -- which will likely appears as "Windows" -- and press Enter to boot from it.
Enter the Windows 10 product key or skip it.
Step 2: Enter the Windows 10 product key if you have it, then click on Next, or click on Skip. The installation process will then ask you to confirm the Windows edition you want to install, and ask you to agree to the terms and conditions.
Reformatting the partition for Winodws 10.
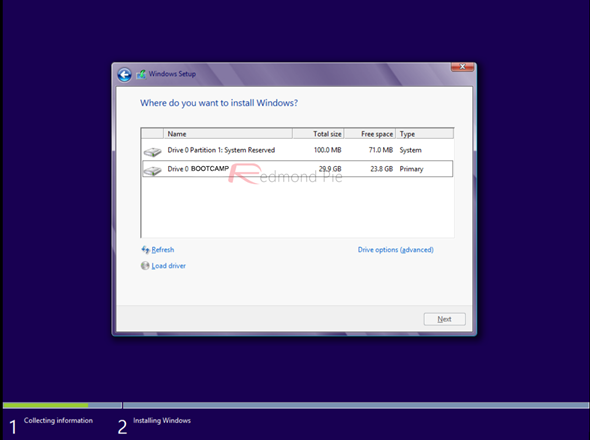
Step 3: Eventually, you will be presented with the all existing partitions, one of which is marked asBOOTCAMP. This is the partition you want to install Windows 10 on. Select it then click on Format. Do not do anything about the rest of the partitions.
Confirming the formatting of the BootCamp partition.
Step 4: Windows Setup will then ask you to confirm, click on OK and then click on Next.
Windows Setup doing its thing.
Step 5: Windows Setup will continue the rest of the setup process by itself. This should take about about 10 to 30 minutes, depending on the speed of your Mac. After that, the Mac will start up with Windows 10. You will be asked to go through with the normal steps of setting up a new Windows computer, including creating an user account.
Installing Boot Camp software is the last step that makes Windows 10 run well on your Mac.
Step 6: As you log in for the first time, you will be greeted with this Boot Camp installation message. Click on Next and follow the rest of the installation, reboot the computer, and you're done!
If you don't see this message, open the flash drive, and double-click on the Setup file inside the BootCamp folder. Once Boot Camp is done installing, you can remove the flash drive from the computer. It's no longer needed.
Windows 10 brings new excitement to Mac computers.
While you have both Mac OS and Windows 10 on the same machine, you can only run one of them at a time. To manually select which operating system to run, during the startup, hold down the Option key after the Apple startup sound and then use the left and right keys to select which one you want to boot into, then press Enter. To set which operating system to boot up as default, use the Boot Camp control panel (Windows) or Startup Disk in System Preferences (Mac).
Removing Windows
If for some reason, you don't want to have Windows 10 (or any version of Windows for that matter) on your Mac anymore, you can permanently remove it and regain the disk space the Mac OS. Here are the steps.
1. Boot into Mac OS, run Boot Camp Assistant and click Continue.
2. Pick the third option that reads Remove Windows 7 or later version then click onContinue.
Removing Windows means the entire Boot Camp partition will be earased.Screenshot by Dong Ngo/CNET
3. In this step, just click on Restore; you will be prompted for the Mac's admin password to confirm. After a short process, Windows will be removed like it had never been installed. Note that removing Windows also means that all data, including software and files, stored on the Windows partition will be permanently erased.
How do i migrate from 2003 to 2008" here's the answer, there's a lot of work, but will pay off.
in this example there are two servers, a 2003DC (192.168.1.241)holding the FSMO roles, and a 2008 server (192.168.1.242) the 2008 has already been joined to the domain, it just needs to take over active directory.
first thing you want to do if you have multiple domain controllers, find out what server is holding the FSMO Roles (domain operations master server)
netdom query fsmo
as you can see 2003-ad.testdomain.local holds all the FSMO roles, that is where we will be transferring roles from.
Insert the 2008R2 CD into the 2003 Domain Controller, Browse to D:/support/adprep, have a command window open
as you can see there is the adprep32.exe, and the adprep.exe, if the primary system you are on (holding FMSO) is a 32 bit machine, then use adprep32, and drag the file to the command line
This process allows your active directory schema to be upgraded, append /forestprep to the end of the command
to continue, hit "c" and then enter, you should see a bunch of this:
when that is completed you should see the following message:
before running the next step, make sure you are running on 2003 domain functional level
raise if necessary
hit yes, and you should get a successful message
now run the previous command with /domainPrep instead
you should get a successful message. From there we can move onto our new domain controller to start the process.
run dcpromo to start the installation process
hit next
Next Again
add to an existing forest
Next
Next
Select Yes
Next
Next/Yes
Next, Enter a password:
Select reboot on completion (you won't be able to do anything anyways until it reboots)
On to moving the FSMO Roles:
The five FSMO roles are:
Schema Master
Domain Naming Master
Infrastructure Master
Relative ID (RID) Master
PDC Emulator
now that that's been said, from here, go to your primary domain controller, and go
start –> Run and type – regsvr32 schmmgmt.dll
hit enter, and you should get a confirmation message that it worked correctly.
then in the run window, type "mmc" to open Microsoft Management Console, go to File, and Add a snap-in. hit add, and select active directory schema
from there you should have the following window:
In the console tree, right-click Active Directory Schema, and then click Change Domain Controller.
Click Specify Name, type the name of the domain controller that will be the new role holder, and then click OK.
after that, right click on the schema, and select "operation masters", and then change, it will ask you, are you sure? from there hit yes
sweet, that was the hard one, from there we have to change the domain naming transfer role, open up Active Directory Domains and Trusts on your 2003 Machine
from here, right click Domains and Trust, and go to connect to domain controller, from here connect to you new 2008, and then select operations master
Look familiar?
transfer this to new new server as well
Bam! those are the two hard ones!
from here go to you 2008R2 Box, and Open Active Directory Users and Computers, and right click on your domain, in this example, it's "test domain", right click, and go to operations master
from here, change the RID, PDC and Infastructure over to your 2008 Box
from there, open a command prompt, and see where you are at:
type netdom query fsmo
as you can see all FSMO roles have been successfully transferred. From here we have a few things left to worry about, like DHCP! What do you do with that?
go to your primary DHCP server, and Stop the DHCP Service, open a command prompt and do the following:
netsh dhcp dump >C:dhcp.txt
it will export your DHCP to a text file in your C:/, copy that to you new server's C:/
run the following command:
netsh exec > c:dhcp.txt
that's it! your DHCP has been migrated, all you have to do is start the service, however, make sure you change your Primary DNS server, your Secondary (if applicable) and your WINS (if applicable) otherwise you will be passing out addresses from the old server.
Finally there is one last step, decommission the old server, unplug the NIC(only if nothing else is running on that server), and log into the new 2008R2-DC
Go into your advanced network settings, and add the IP from the old server like so:
also change your DNS Settings so the local server is the primary
That's It!
expect that there are some UN-forseen dependencies that this article more than likely has not covered, moving active directory can be a big deal if you have not thought of this ahead of time, if you did all the above steps you should be in the clear at this point


 hit enter, and you should get a confirmation message that it worked correctly.


