UTM (Unified Threat Management) solution deployed at the gateway level and scans all the malicious and suspicious traffic which passes through the network. UTM has multiple parameters such as
- URL Filtering
- Application Control
- Intrusion Prevention System
- Antivirus & Anti-Bot
- Data Loss Prevention
Let’s discuss all the features one-by-one.
URL Filtering: Check Point UTM
URL filtering applies to web-browsing traffic and divides traffic to multiple categories. Based on URL-Filtering Category we can allow/block traffic in Firewall policy. There are more than 100 Categories which are given by Checkpoint in the URL=Filtering like social-networking, banking, adult-sites, news etc.
TASK -> We will block CNN.COM News site by using URL Filtering
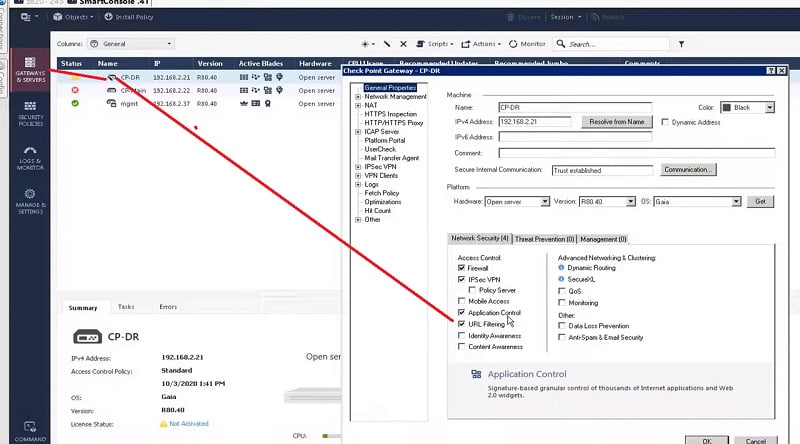
- Here we will first enable URL Filtering Blade in Checkpoint Firewall.
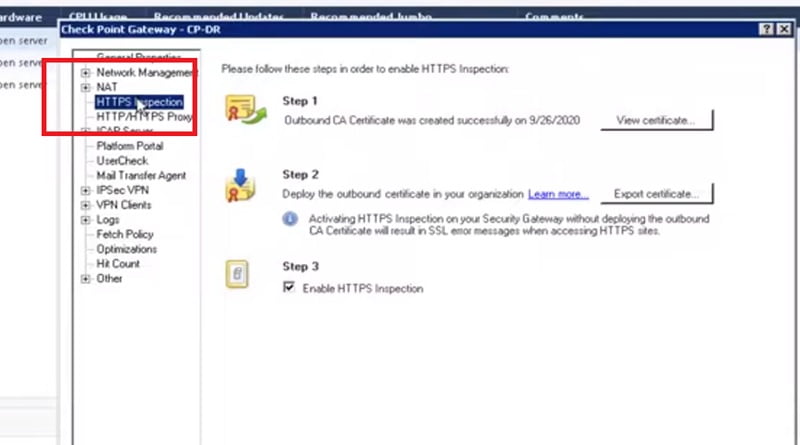
- Enable HTTPS Inspection in Checkpoint Firewall to inspect Web-browsing traffic.
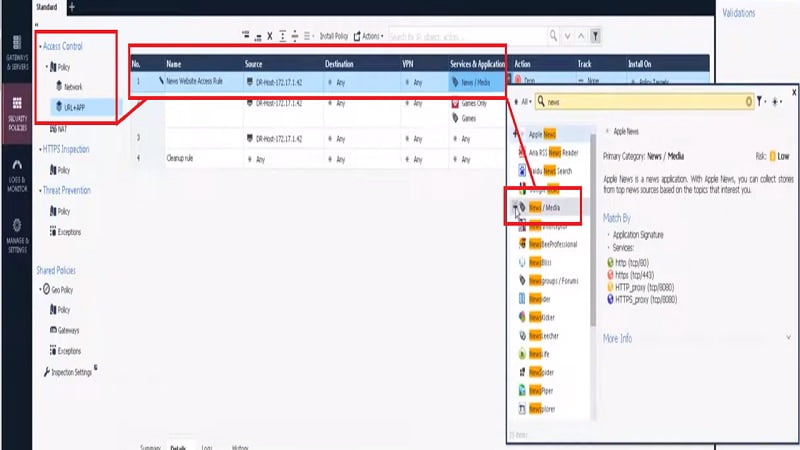
- First Create Policy to allow news site in policy
- Security Policy -> URL+APP -> Policy Name -> Source Address -> Destination ->Services and Applications (Select News/Media) -> Action (Allow)
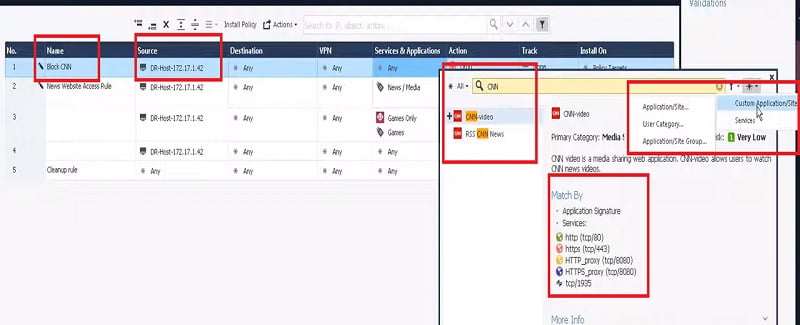
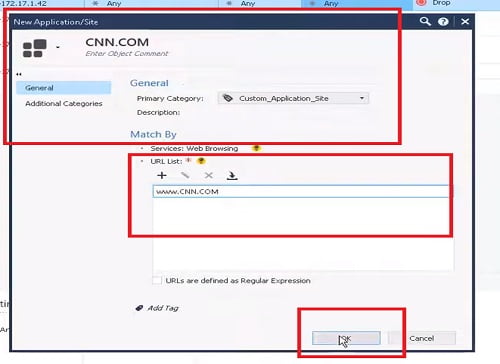
- Now Create another Policy above Access policy to deny rule for CNN.COM news
- Policy (Block CNN) -> Source -> Destination –
> Services & Application –>(Create Customised Category CNN.COM) -> Action (Drop)
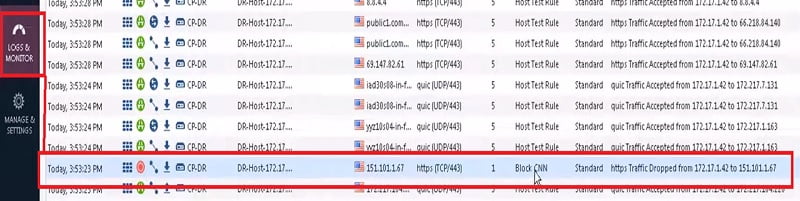
- Verify the access through logs -> Traffic dropped by firewall.
Application Control: Check Point UTM
Here, we will block sites based on Application.
Application control, identify and parse traffic uniquely from various applications in an organisation, Companies enable Application Control to filter malicious traffic and block all the suspicious content of the network.
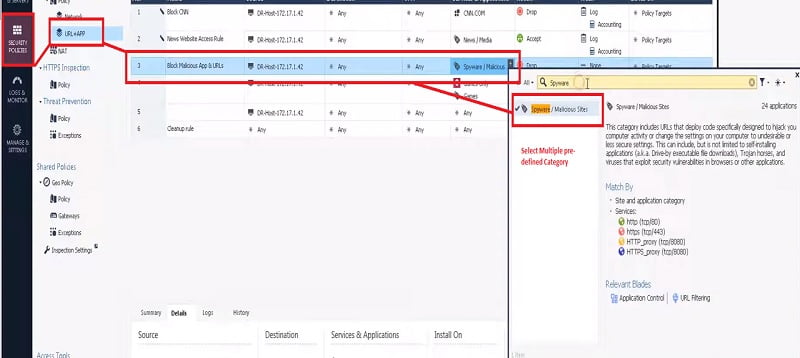
1. Security Policies🡪 URL + APP🡪 Source 🡪 Destination🡪 Services & Application (Select Application)
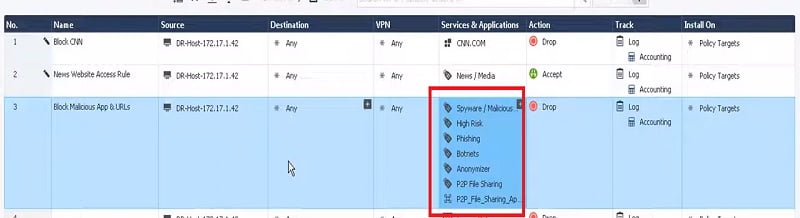
2. Select multiple applications like
- Spyware
- High Risk
- Phishing
- Bonnets
3. Action🡪 Drop
4. Install Policy
Validate the access from logs
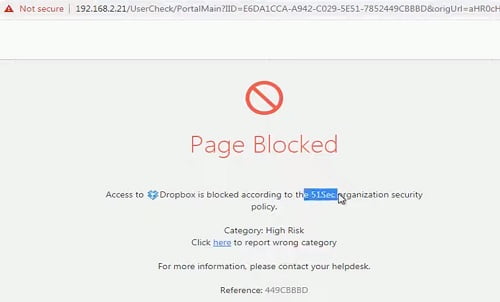
Try to access drpbox.com and got below drop logs in Check point

IPS Intrusion Prevention System: Check Point UTM
IPS is the most effective and multilayer approach to protect your network. It tremendously reduces the risk of traffic exposure to exploitation.
1. Note -> Enable IPS Blade in Checkpoint Firewall
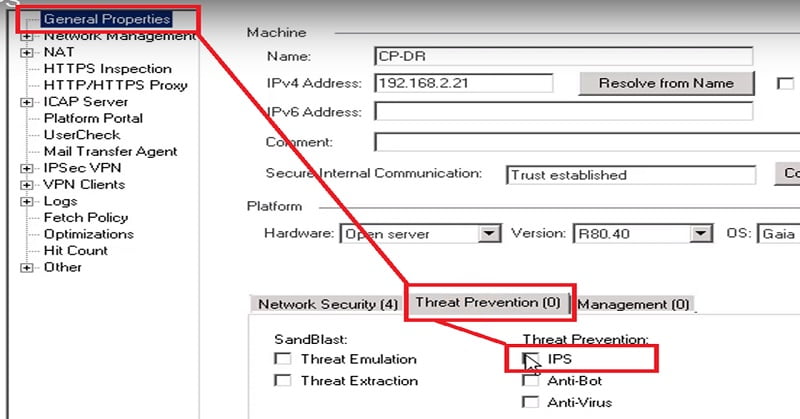
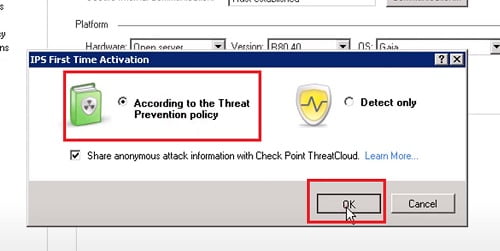
2. We have two options
- Threat Prevention Policy
- Detect Only
Select Threat Prevention Policy
3. Now Enable Policy to Activate IPS Profile in it
4. Go to -> Threat Protectionà Policy
5. We have two policy here , one is for MTA traffic
6. Second one is the default policy for IPS
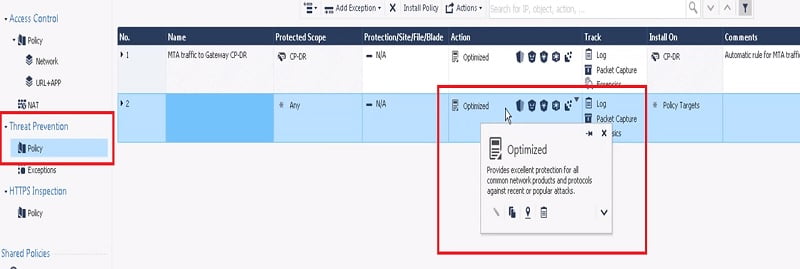
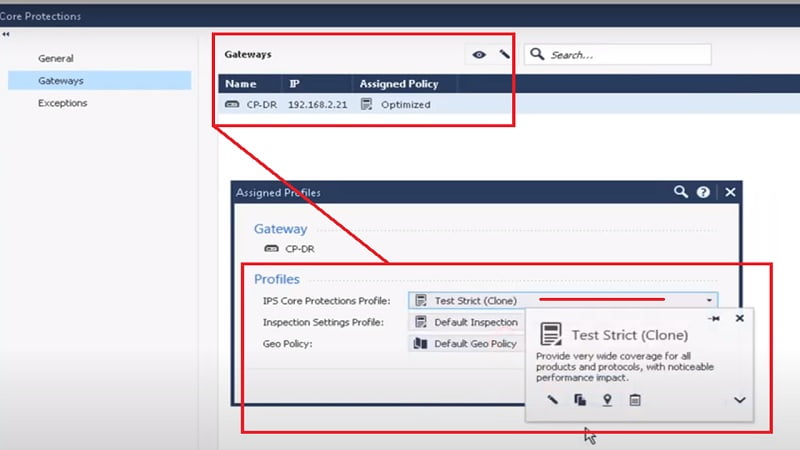
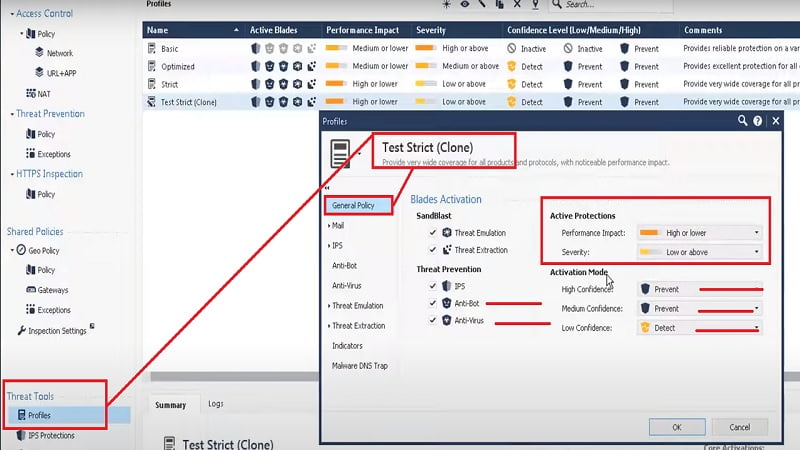
7. Go down to Threat Tools 🡪 profiles🡪 Create Test Strict Clone (Customised) Profile
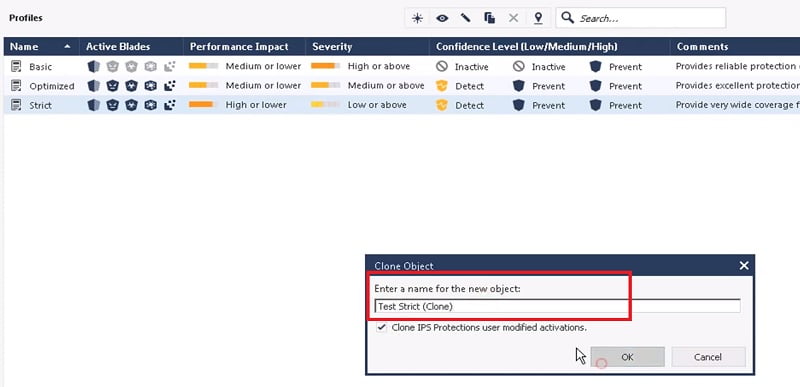
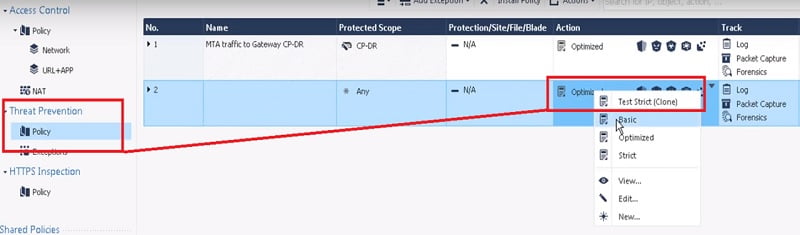
8. Apply Strict Clone Profile to Threat Prevention Policy
9. Install Policy in Checkpoint SmartConsole
10. Validate the logs
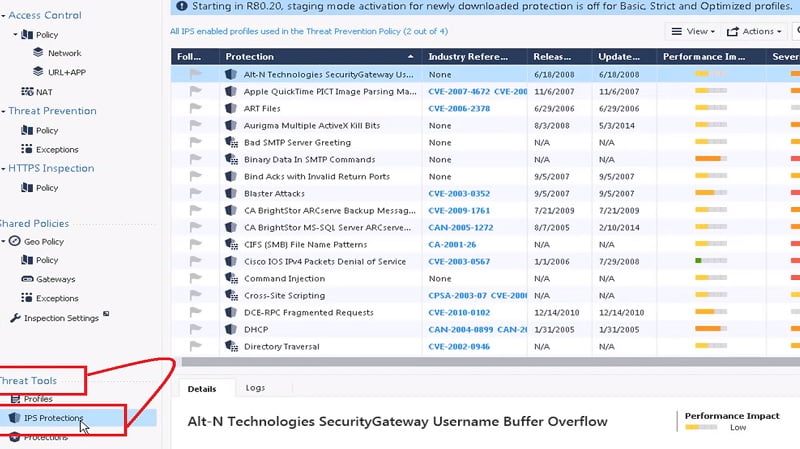
11. Go to 🡪 IPS Protection
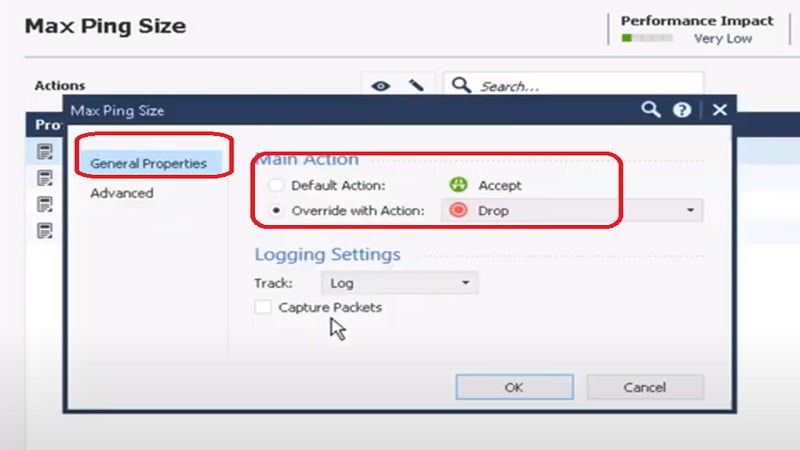
12. Select Max Ping Size and add Strict Clone Profile in it.
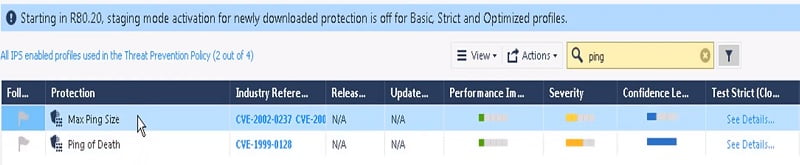
13. If the Ping size is greater than 2500 bytes, signature will be triggered. Now install the policy in Checkpoint SmartConsole.
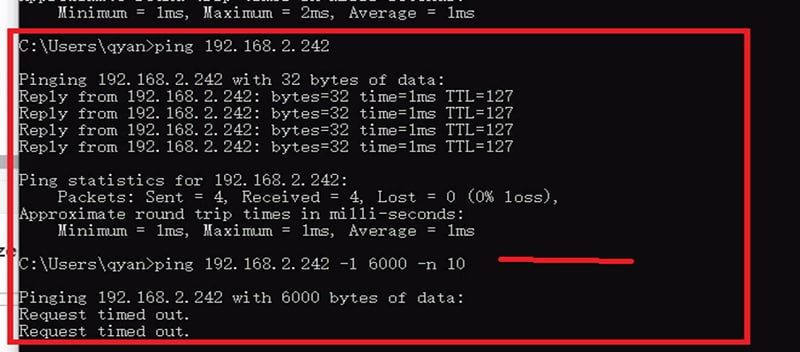
14. IPS allows normal ping from network, however blocks large packet through the firewall and gives Request Time Out in ping response.
15. Let’s Check Logs for the same in Firewall. Traffic is being dropped by a firewall with a message large ping.

Antivirus: Check Point UTM
Antivirus software is a firewall application that protects systems and removes harmful software or code which are created to damage data. Nowaday’s every second a new malware is created to destroy the network. So to detect and block such traffic in network Checkpoint uses advance Anti-virus and Anti-bot Application which blocks any suspicious traffic/content
1. Enable Anti-virus and Anti-bot Blade in the Checkpoint and Install the policy.
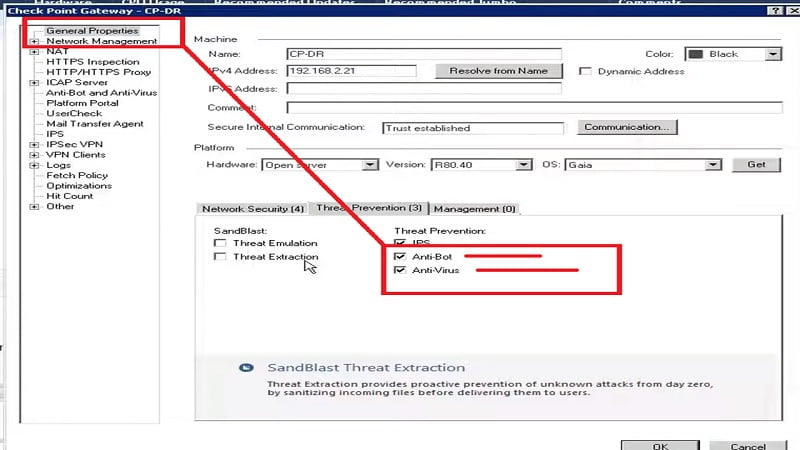
2. Go to Profiles which we have created above (in IPS section) and Check Anti-virus and Anti-Bot settings.
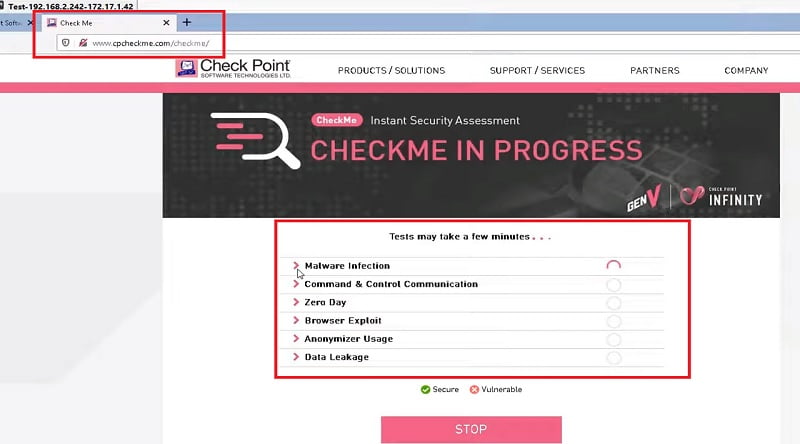
3. Now test your browser protect by using https://cpcheck.com to verify if the browser is protected or not and which services is being used.
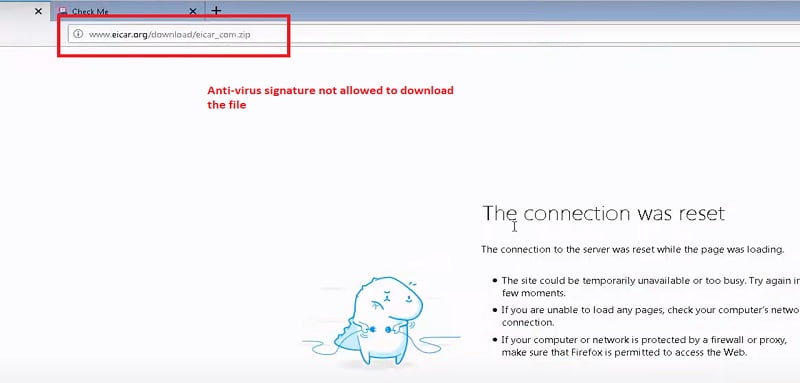
4. Try to access any site and download content from there.
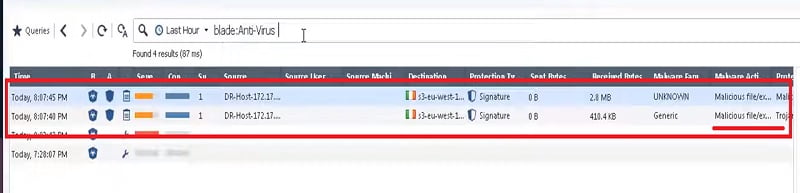
5. Now check the logs here in Checkpoint Log Monitor and you can see preventive log messages in the threat logs of the firewall. You can see the Checkpoint assessment report also.
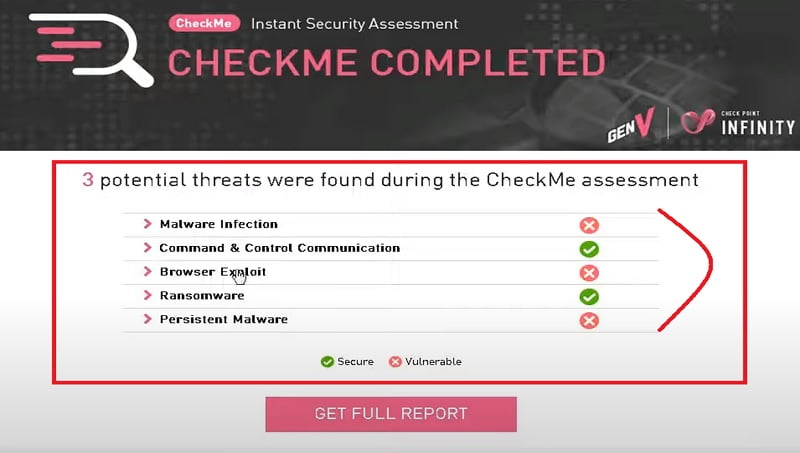
Checkpoint UTM DLP (Data Loss Prevention) – R80.40
DLP is the part of Security Integrity which means if any data passes through the network it should be un-altered. And must be scanned by Firewall, like password protected files or any text document through emails.
Data Loss Prevention (DLP) solutions are designed to guarantee that any insightful data in a company/network must not be accessed by illegal/unprotected users, nor misplaced or stolen.
1. We need to enable DLP in Firewall Gateway by using SmartConsole
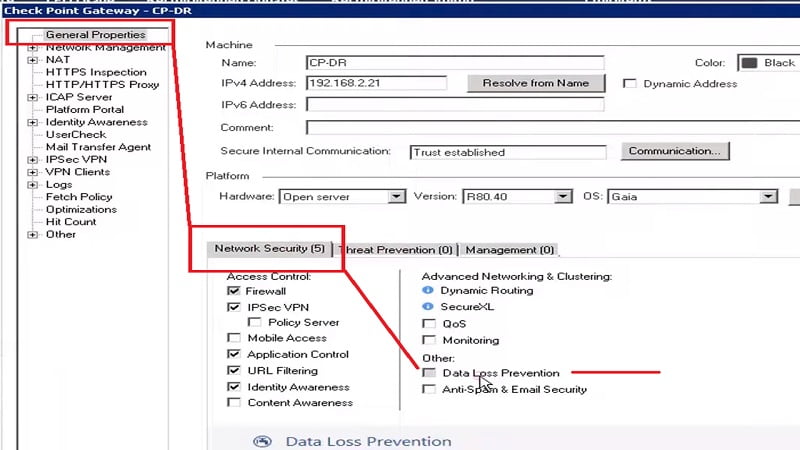
2. Enable DLP Client in below settings as well
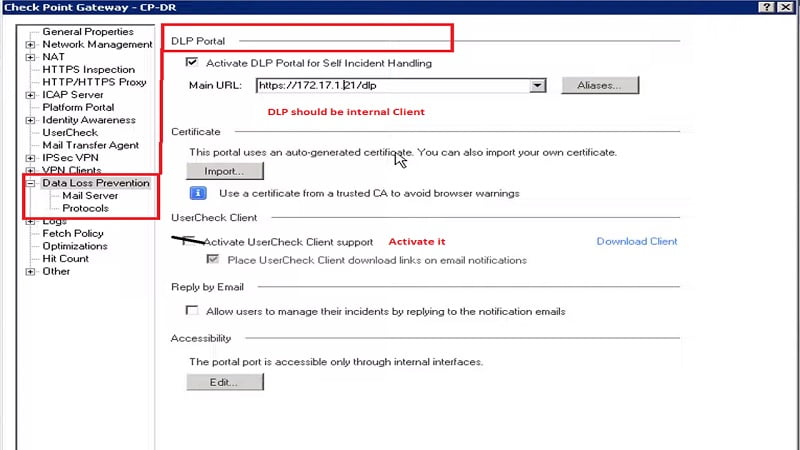
3. Enable Email to transfer DLP emails
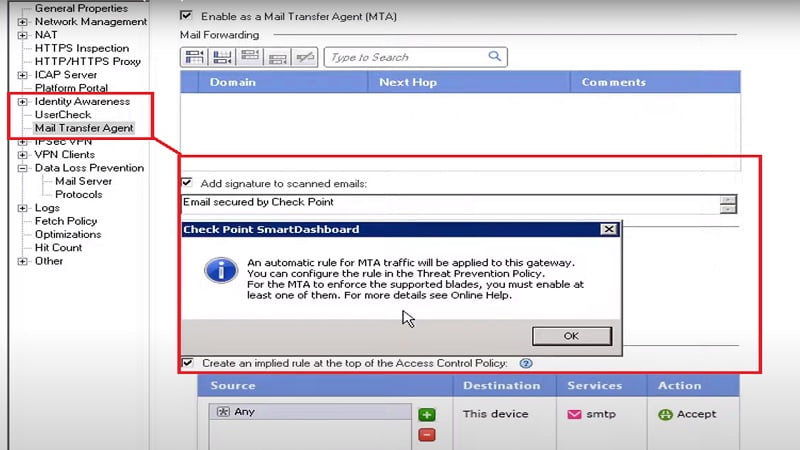
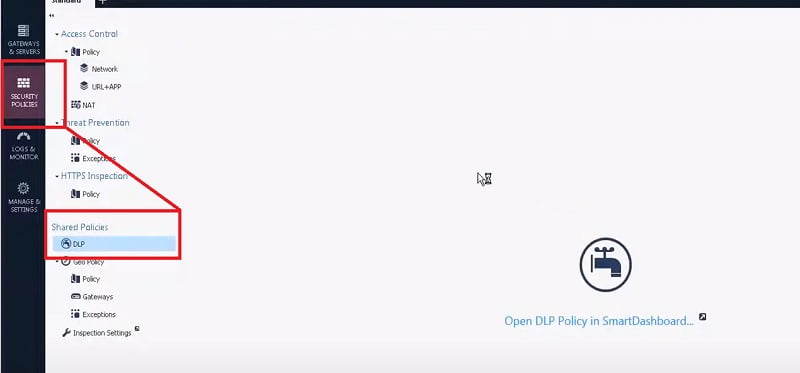
4. Enable DLP over SmarttDashboard Security Policies 🡪 Shared Policies🡪 DLP
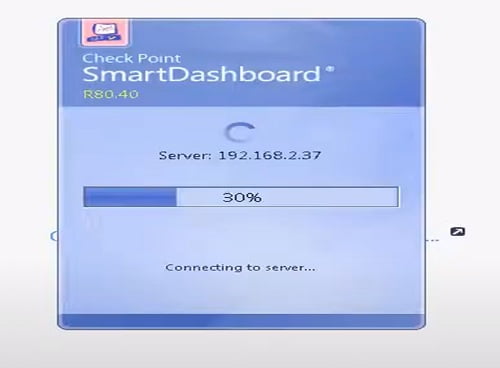
5. Here is SmartConsole trying to Connect with SmartDashboard
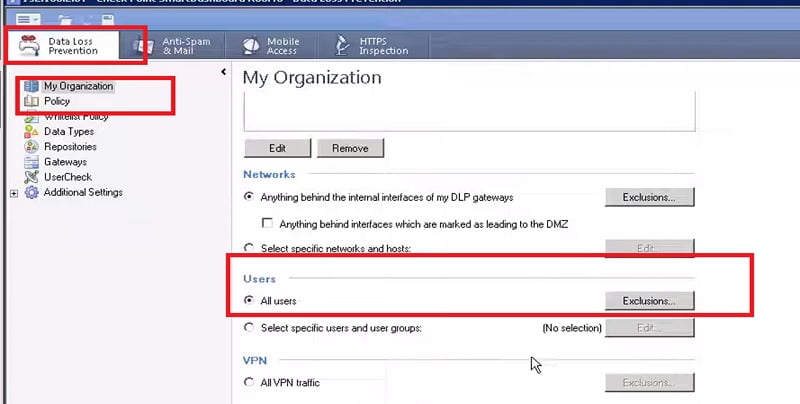
6. Select All users in DLP🡪 Organisations Policy
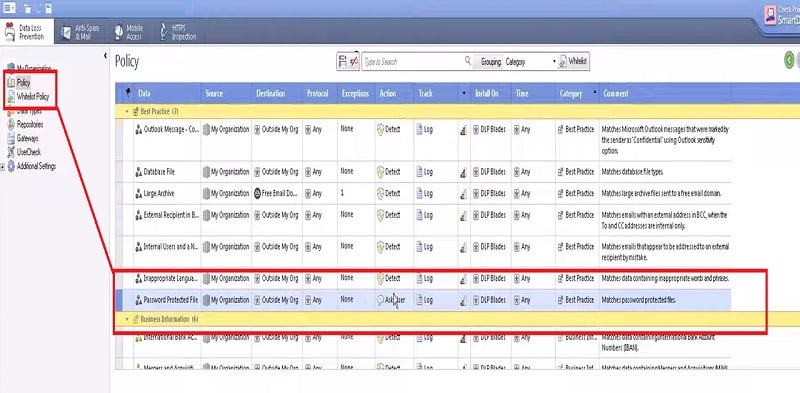
7. Enable DLP Policy for Password Protected Files
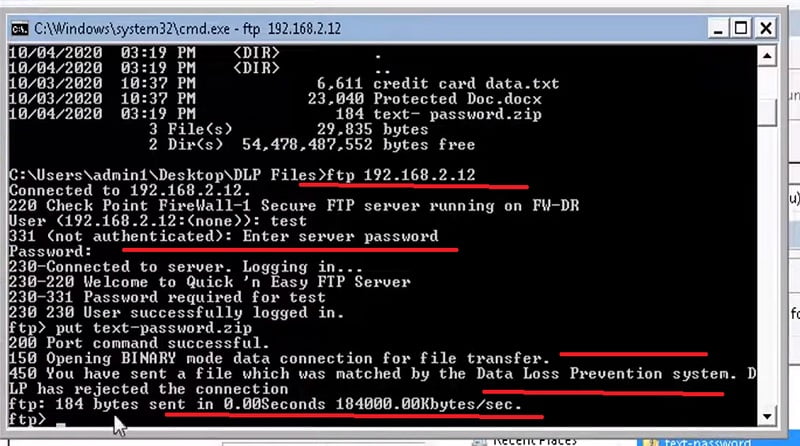
8. Now we are trying to transfer file over FTP protocol which is password protected
9. Now check the firewall logs if firewall able to detect the file
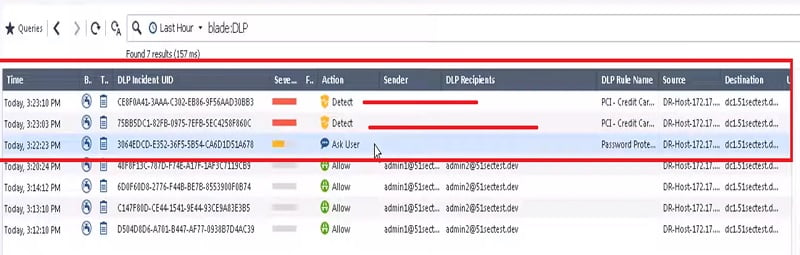
DLP works as we have configured in the above policy.